
Key Takeaways
Paver lighting is a permanent, low-voltage electrical installation—not a plug-in product—so fixture type, wire gauge, transformer sizing, and waterproof connections all require professional judgment to get right.
LED paver lights are the standard for good reason: they draw minimal power, last years longer than halogen alternatives, and, paired with a timer or photosensor, add virtually nothing to your monthly electric bill.
Always ask any installer how wiring locations will be documented. Photos or as-built documentation can make future repairs or additions much easier.
Fixture load rating matters: a fixture designed for a pedestrian walkway will crack under vehicle traffic, so confirm your installer is specifying driveway-rated housings for any area cars will cross.
A vague quote with no fixture brand, wire spec, or transformer details is a red flag; a qualified installer should be able to explain every component and why they chose it.
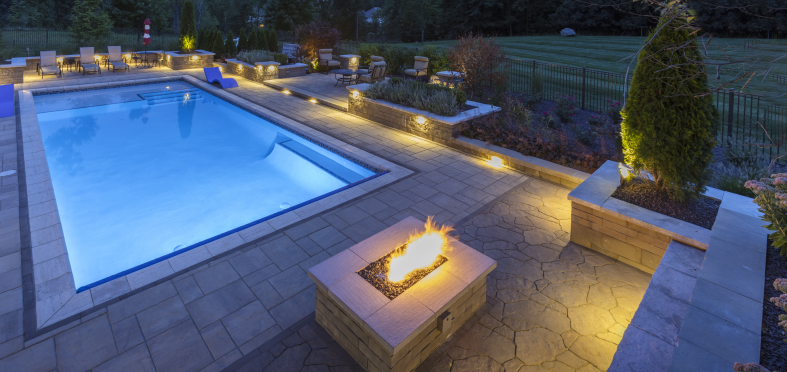
Paver lighting can completely change the way you use your outdoor space, turning a dark driveway, walkway, or patio into a feature you can enjoy long after the sun goes down. It also adds practical benefits, improving visibility around steps, edges, and elevation changes where trips are most likely to happen.
But here's what most homeowners don't realize when they start searching:
Paver lighting is a permanent, low-voltage electrical installation, not a plug-in product.
Getting it right depends on fixture selection, wire sizing, waterproof connections, and transformer planning. These are all decisions that take real expertise to make well.
What Is Paver Lighting?
Paver lighting refers to low-voltage LED fixtures set flush into or directly beside driveways, walkways, patios, and steps, so that light emerges from ground level. Unlike a post lantern or a floodlight mounted on a wall, paver lights are part of the hardscape itself, meaning you walk over them, drive over them, and barely notice them during the day.
Homeowners invest in paver lighting for two main reasons: safety and ambiance.
On the safety side, illuminated step edges and path borders help reduce the risk of trips and falls. On the ambiance side, a driveway lined with flush paver lights at night looks genuinely architectural. It’s the kind of detail that reads as intentional rather than afterthought.
The technology shift from halogen to LED matters here. Modern LED paver fixtures draw a fraction of the wattage, produce far less heat (important when fixtures are embedded in material), and last years longer.
Modern LED paver fixtures draw a fraction of the wattage of older halogen systems, produce far less heat, and have significantly longer service lives. According to the U.S. Department of Energy (DOE), LED lighting offers substantial energy savings compared to older lighting technologies, making it the preferred choice for most outdoor lighting applications. While paver lighting represents only a small portion of a home's overall lighting use, LED fixtures remain the most efficient option available.
The Four Main Types of Paver Lights (And Where Each One Works Best)
Choosing the right fixture type is the first real decision in any paver lighting project, and it's one your installer should walk you through during a site visit.
Paver Light Types at a Glance
| Light Type | Best Application | Key Spec to Confirm With Your Installer | Common Pitfall |
|---|---|---|---|
| In-paver / brick-format lights | Driveways, wide walkways; replaces one paver in the field | Load rating (vehicle-rated vs. pedestrian-only) | Installing pedestrian-rated fixtures in a driveway can lead to premature failure under vehicle traffic |
| Step and riser lights | Vertical face of steps, retaining walls, grade changes | Moisture ingress rating (IP65 or higher for exposed faces) | Skipping step lighting entirely, leaving the most common trip-hazard zones dark |
| Border and edge lights | Patio perimeters, path edges | Beam angle (wash vs. spot) to avoid glare into foot traffic | Lights aimed upward at foot level create glare rather than wash |
| Well lights near pavers | Planting beds or lawn adjacent to paver areas, for uplighting | Housing depth vs. soil type; drainage around the housing | Shallow installation in clay soil leads to heaving and cracked lenses |
How a Professional Paver Lighting Installation Actually Works
Understanding the paver lighting installation process helps you evaluate quotes intelligently.
Step 1: Site assessment. A qualified installer walks your property, maps existing paver areas, locates underground utilities, and identifies where the transformer can be mounted near a suitable GFCI-protected power source.
This step determines everything downstream.
Step 2: Design and layout. Fixture positions are planned for even light distribution: no hot spots near the transformer, no dim zones at the far end of the run. Wiring paths are mapped specifically to avoid areas where pavers might need to be lifted for future repairs.
Step 3: Low-voltage wiring. Twelve-volt cable is run beneath or alongside the paver base. Connections are made with waterproof wire connectors specifically rated for direct-burial applications. Standard wire nuts are not designed for underground use and are prone to corrosion and premature failure.
Step 4: Fixture setting. Individual pavers are carefully lifted, the fixture is carefully installed according to the manufacturer's requirements, and the pavers are reset flush with the surrounding surface. This is skilled finish work, not rough construction.
Step 5: Transformer and controls. A low-voltage transformer is mounted at the house and programmed with a timer, photosensor, or smart controller. The DOE recommends photosensors and timers for outdoor lighting as a straightforward way to prevent lights from running unnecessarily. A good installer sets this up before they leave.
What to Expect: Costs, Timelines, and What Affects the Price
Installation costs vary considerably depending on the number and type of fixtures, wiring distances, accessibility, whether the lighting is installed during new construction or retrofitted into an existing hardscape, and the level of automation desired.
The biggest cost drivers are the number of fixtures, the linear feet of wiring and trenching, the transformer capacity you need, and whether existing pavers have to be carefully lifted and relaid versus wiring during new construction. Larger, multi-zone properties naturally sit at the higher end.
The good news is that what's expensive to install is cheap to run: low-voltage LED fixtures draw very little wattage, so once the system is in, operating costs are negligible—often just a few dollars a month.
While it can increase up-front cost to add smart controls, app-based dimmers, color-temperature adjustment, or scheduling, these functional features improve convenience and long-term savings.
Most standard residential installs (a driveway or single patio) are completed in one day. Larger properties with multiple zones may run two to three days.
Red flag to watch for: Be wary if you receive a vague quote with no fixture brand, wire gauge, transformer model, or warranty terms. A confident, qualified installer should be able to name every component and explain why they chose it.
Why LED Paver Lights Are the Smart Long-Term Choice for Energy Efficiency
According to the U.S. Department of Energy data, switching from older lighting technologies to LED can significantly reduce household lighting energy use. While paver lighting represents only a small portion of that total, LED fixtures are still the most energy-efficient option for outdoor lighting.
Pairing those fixtures with a photosensor or timer (so lights only run after dark) eliminates the waste of lights burning through the afternoon.
Many modern transformer systems include timers, astronomical timers, photocells, or smart app controls that automatically turn the lights on and off while minimizing unnecessary energy use.
Here’s a good question to ask any installer: "What transformer and control options do you recommend to minimize my operating cost?" The answer tells you whether they're thinking about your long-term experience or just closing the sale.
Common Mistakes Homeowners See With Cheap or DIY Paver Lighting
These are the failure modes a qualified installer is specifically trained to avoid:
Wrong fixture load rating. A pedestrian-rated fixture in a driveway is likely to fail prematurely under vehicle traffic. Driveway zones require housings rated for vehicle traffic, full stop.
Undersized wire gauge. Cable sizing should be based on the total fixture load and the length of the wire run. Undersized cable can result in voltage drop, causing fixtures farther from the transformer to appear noticeably dimmer.
No waterproof connections. Standard wire nuts underground corrode within one to two seasons, causing intermittent failures that are expensive and disruptive to trace and repair.
Transformer undersizing. If you ever want to add fixtures, an undersized transformer limits future expansion and may reduce system performance or shorten transformer life. A pro sizes it with headroom built in.
Poor fixture placement. Lights aimed directly upward into foot traffic create glare. A skilled installer positions fixtures for wash light, not a spotlight in your eyes.
Questions to Ask Before You Hire a Paver Lighting Installer
A confident, qualified installer will welcome every one of these questions. Evasiveness is a warning sign.
Do you use fixtures rated for the specific load in each location: vehicle-rated for the driveway, pedestrian-rated for the patio?
What wire gauge do you use, and how do you waterproof underground connections?
What transformer brand and size will you install, and does it have capacity to add fixtures later?
Will you provide a wiring diagram or cable map showing where lines run, so future paver repairs don't accidentally cut wires?
What warranty do you offer on labor, and what warranties do the fixtures themselves carry?
How do you handle fixture replacement if a single unit fails. Do pavers need to be lifted, and is that covered?
What control options do you recommend (timer, photosensor, smart app), and how will you program them before the job is complete?
The right paver lighting installation is one you'll never have to think about: lights come on at dusk, illuminate exactly what they should, and turn off automatically.
A successful lighting system is about much more than installing fixtures. Thoughtful design considers sightlines, focal points, architectural features, and how people move through the space. Often, the best lighting designs use fewer fixtures placed intentionally, rather than simply adding more lights.
That combination of decisions is exactly what separates a system that performs for a decade from one that starts failing in the second winter.
If you're ready to explore what a project looks like for your property, the questions above are a solid starting point for any conversation with a qualified installer. When it’s time for that discussion, we’d love to discuss options with you.
For more inspiration, check out our gallery of our work, read more on the blog, or catch up with us on Instagram.
Frequently Asked Questions
-
They can absolutely be added to an existing installation. A professional installer will carefully lift the relevant pavers, set the fixture housing into the base material, run wiring, and relay the pavers, leaving the surface looking undisturbed. Retrofitting is more labor-intensive than installing during new construction, which is reflected in the quote, but it's a routine part of what experienced installers do.
-
Quality LED paver fixtures are rated for tens of thousands of hours of operation—far longer than the halogen fixtures they replaced. Most modern units are sealed assemblies rather than traditional bulb-and-socket designs, so "bulb replacement" typically means replacing the fixture or LED module if it ever fails, depending on the manufacturer and fixture design . A good installer will explain whether the fixtures they specify are field-serviceable or full-replacement units, and what that process involves.ption text goes here
-
Yes, if the correct fixtures are specified. Driveway applications require housings rated for vehicle traffic loads; pedestrian-rated fixtures are not engineered for that stress and will crack. This is one of the most important questions to ask your installer upfront, and any qualified pro will distinguish between driveway-rated and walkway-rated products without prompting.
-
Low-voltage LED paver lights draw very little wattage per fixture. Operating costs are typically very low, especially when paired with timers or photocells that prevent unnecessary operation.
-
Yes. Most low-voltage transformer systems support timers and photosensors as a baseline, and many now offer Wi-Fi-enabled smart controllers that integrate with apps or home automation platforms. The DOE recommends timers and photosensors as a straightforward way to avoid unnecessary operation. Ask your installer which control options their preferred transformer supports and whether those controls can be expanded later.
