Luxury Outdoor Living Ideas: a Framework for Elevated Backyard Design

Most luxury outdoor living lists read like shopping suggestions: add a fire pit, upgrade your cushions, install string lights. That's not luxury design; it’s simply buying products. 

Plus, you probably already knew that buying more expensive items could feel like a luxury fix. 

But the fact is, something more essential separates a $40,000 outdoor renovation that feels transformative from a $200,000 update that feels hollow: the game-changer is the design framework behind the project, not the budget.

What Actually Defines “Luxury” in Outdoor Living? (It's Not What You Think)

Again, Luxury outdoor design is less about budget and more about how well the space fits the people using it. As in, their sensory preferences, their rituals, their climate, their personal style.

That’s why one homeowner’s luxury can look like a Moroccan-tiled courtyard with a hand-carved stone fountain, cascading hydrangea, and clematis climbing through wrought-iron screens, while another reflects a minimalist approach, like a single slab of honed basalt beside a carefully planned planting design, all designed to create a quieter, more contemplative atmosphere.

Both are luxury. Neither is defined by what it costs per square foot.

As you’re considering your own space as well as the experts who might help you shape it, take careful note of how they view the space between sustainability and opulence. Is this gap seen as a point of tension, or one of opportunity? The most prestigious residential landscape projects now treat ecological responsibility as a design constraint that sharpens creativity rather than limiting it. 

Sophisticated outdoor spaces increasingly prioritize sustainability through durable natural materials, regionally appropriate planting design, efficient lighting systems, and infrastructure built for long-term performance.

The 5 Design Pillars of a Truly Luxurious Outdoor Space

Pillar 1: Biophilic Integration

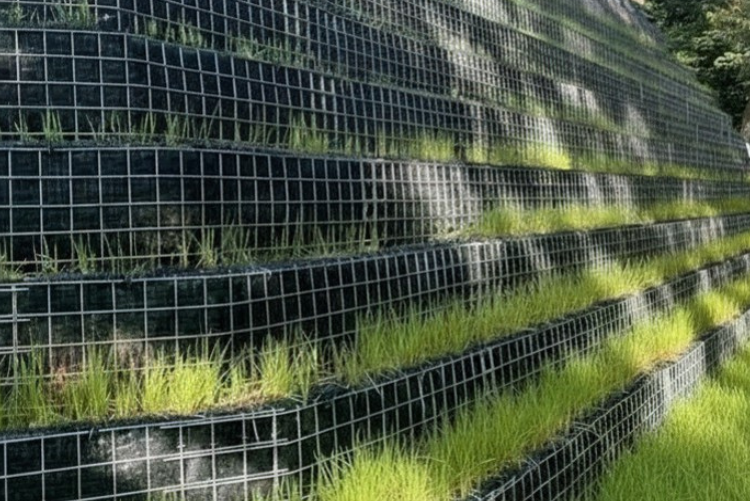
Biophilic design focuses on forging connections between people and nature by integrating natural elements into built environments. The key is to move beyond a basic "add plants" mentality; instead, living systems are woven into the hardscape architecture. Think plant selections that complement the architecure of the home, sequential blooms throughout all growing seasons, layered canopy structures, and evergreen screens that act as layered plantings for privacy and noise reduction, creating both privacy and acoustic separation.

Pillar 2: Smart Materials

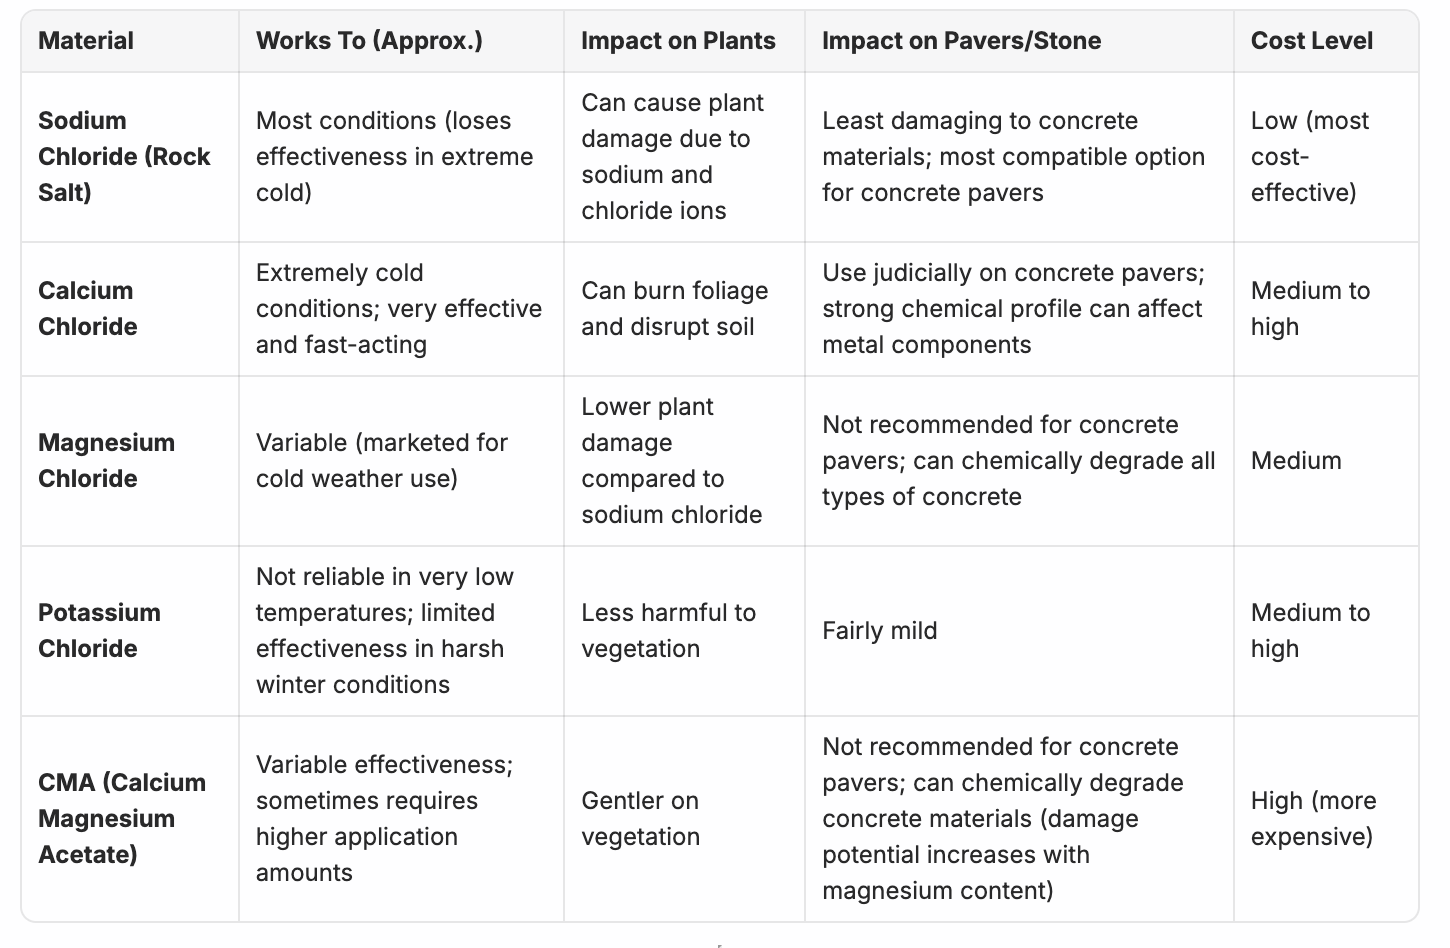
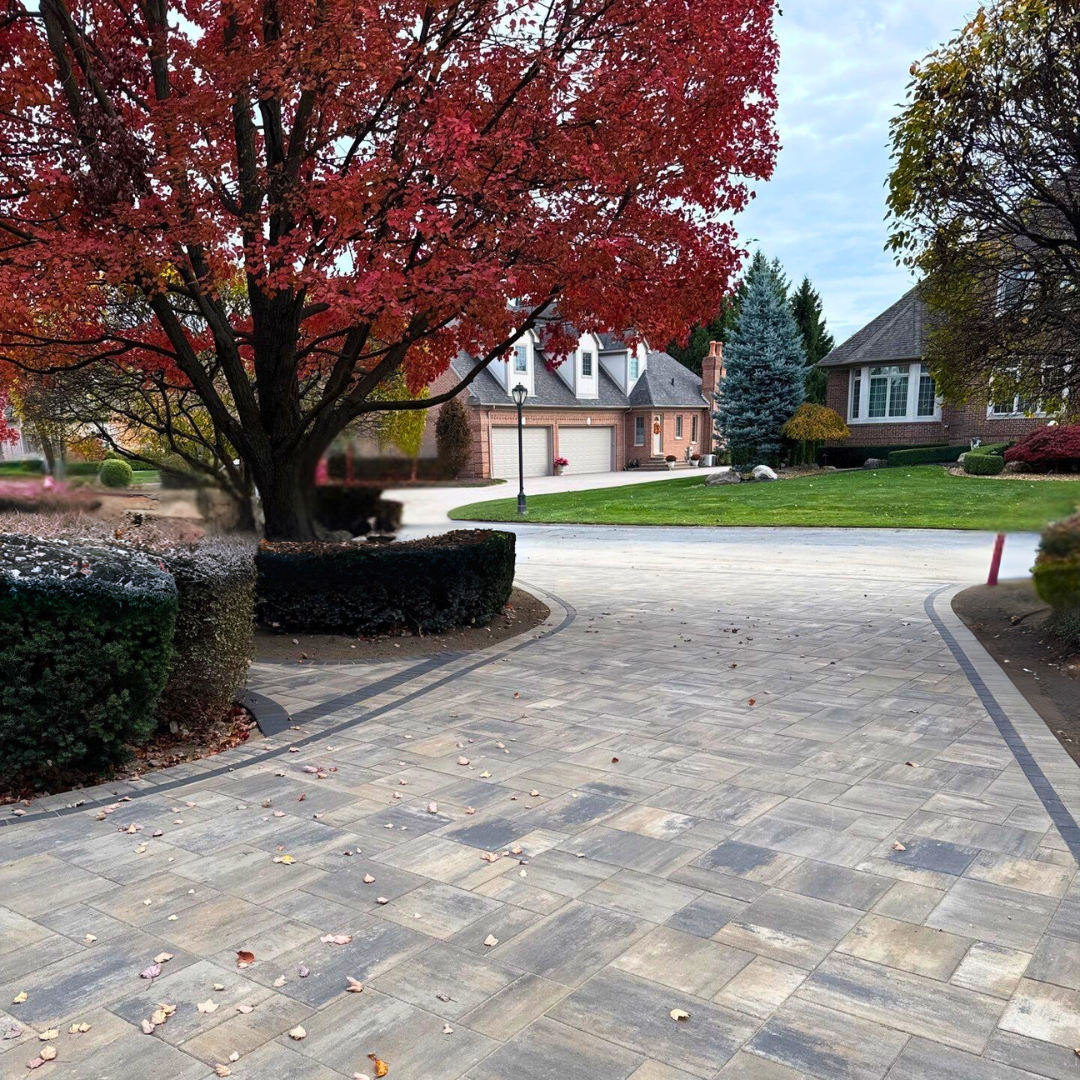
Premium outdoor design demands materials selected for 4-season performance, not showroom appeal. In Michigan, material selection matters. Some products look great the first year but struggle after repeated freeze-thaw cycles. So we typically steer clients toward materials that hold up long term, not just what looks best in a showroom. It’s also important to consider factors like humid summers or heavy tree coverage. In areas with dense shade and moisture retention, proper drainage and mildew-resistant finishes matter just as much as the surface material itself.

Pillar 3: Technology Layer

A well-designed outdoor space also depends on what you don't see: the wiring runs concealed from view, the hidden drainage systems, and the ability to control multiple outdoor zones seamlessly. Imagine smart outdoor lighting with programmable scenes, warm-dim transitions, and layered zoning; integrated hydronic patio heating systems; weatherproof audio systems with buried conduit for future upgrades; and more.

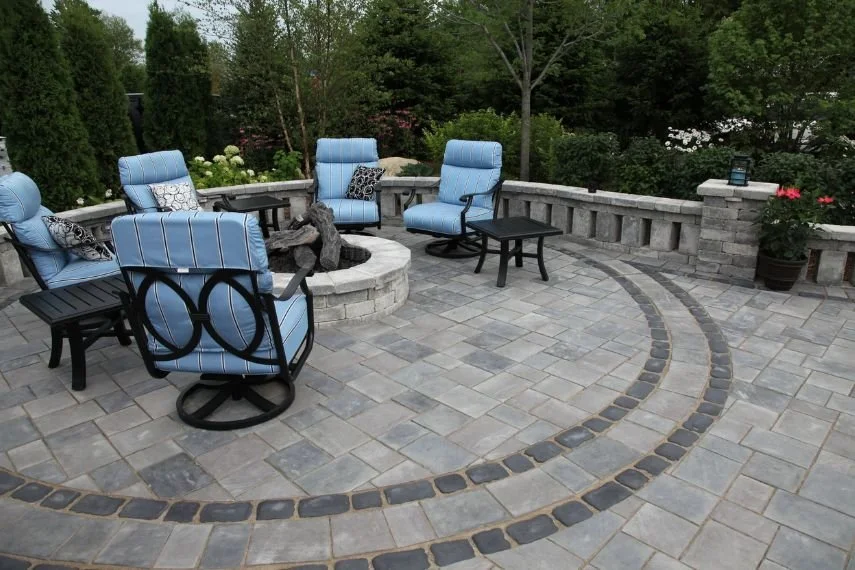
Pillar 4: Wellness Infrastructure

This is the most underscored pillar in typical residential projects. Think cold plunges adjacent to custom sauna retreats, screened yoga platforms oriented for morning light, and hammock lounges buffered by immersive planting for privacy. Wellness features can be the reason an outdoor space gets used daily rather than occasionally.

Pillar 5: Artisan Identity

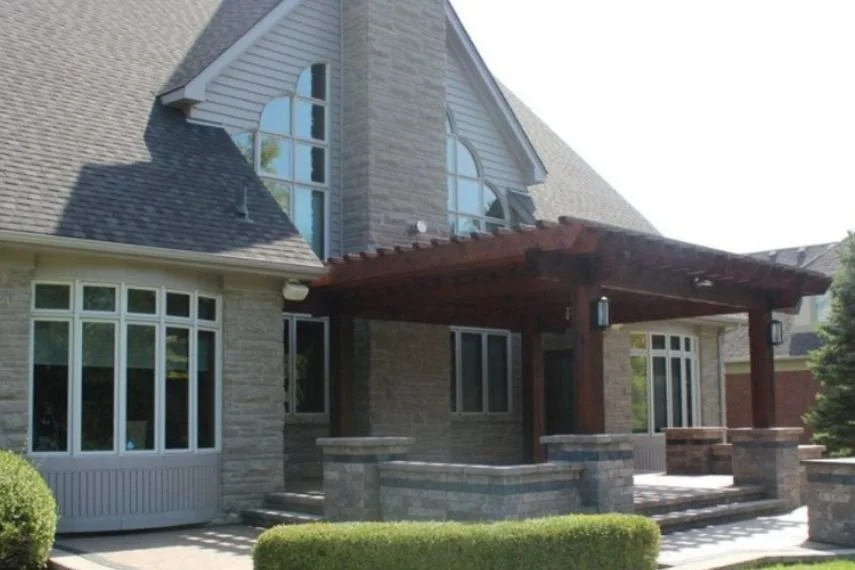
Does the space have a personality? The best backyards reflect the homeowner’s distinct design perspective. Imagine a hand-forged steel sculpture, custom stone detailing that references the home’s architectural character, or a pergola designed by a local craftsperson rather than sourced from a big-box catalog.

12 Luxury Outdoor Living Ideas for a More Elevated Backyard

Once the foundational design principles are in place, the next step is applying them in ways that improve how the space feels and operates day to day. The best luxury outdoor environments are not built around isolated features. They are shaped around entertaining patterns, seasonal use, comfort, privacy, and long-term durability.

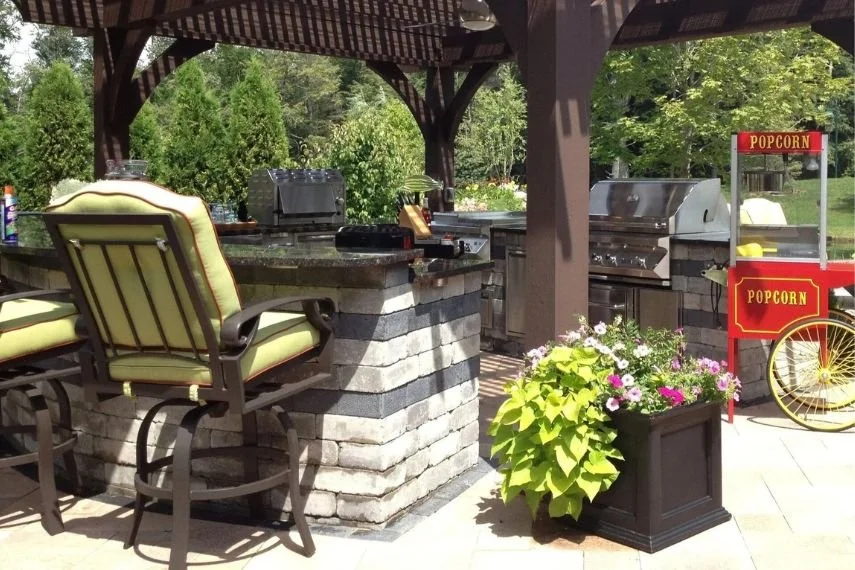
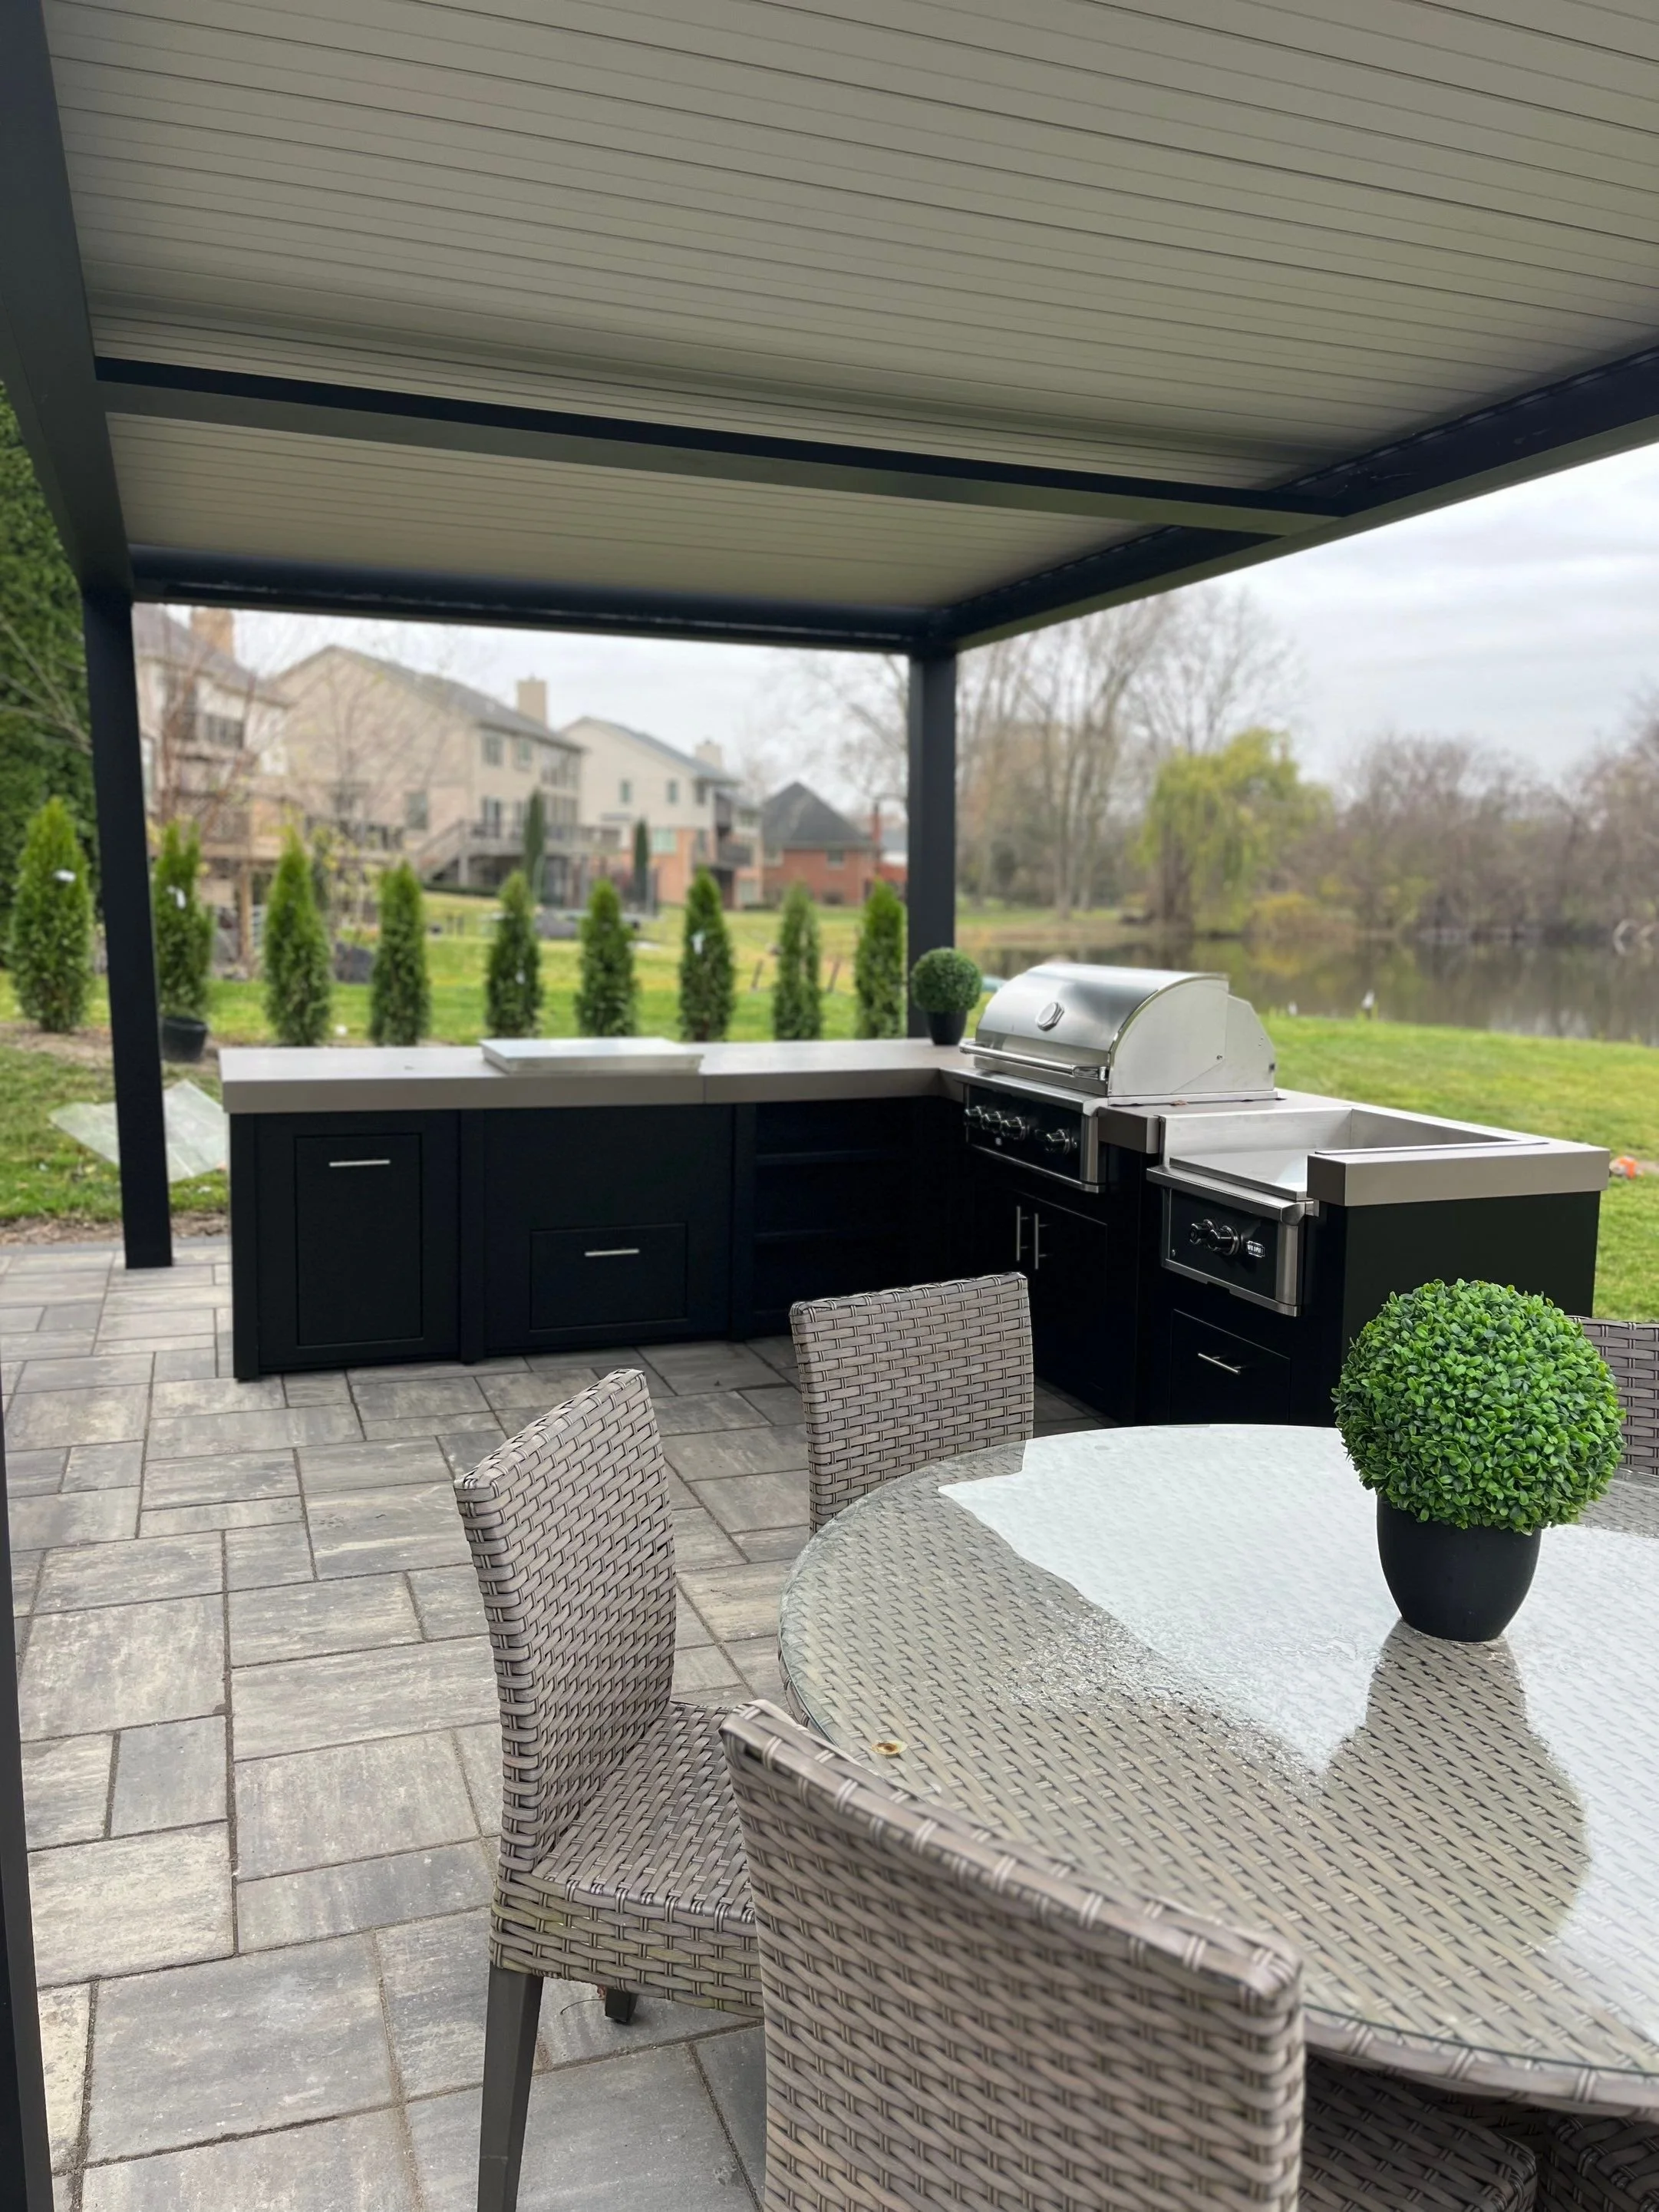
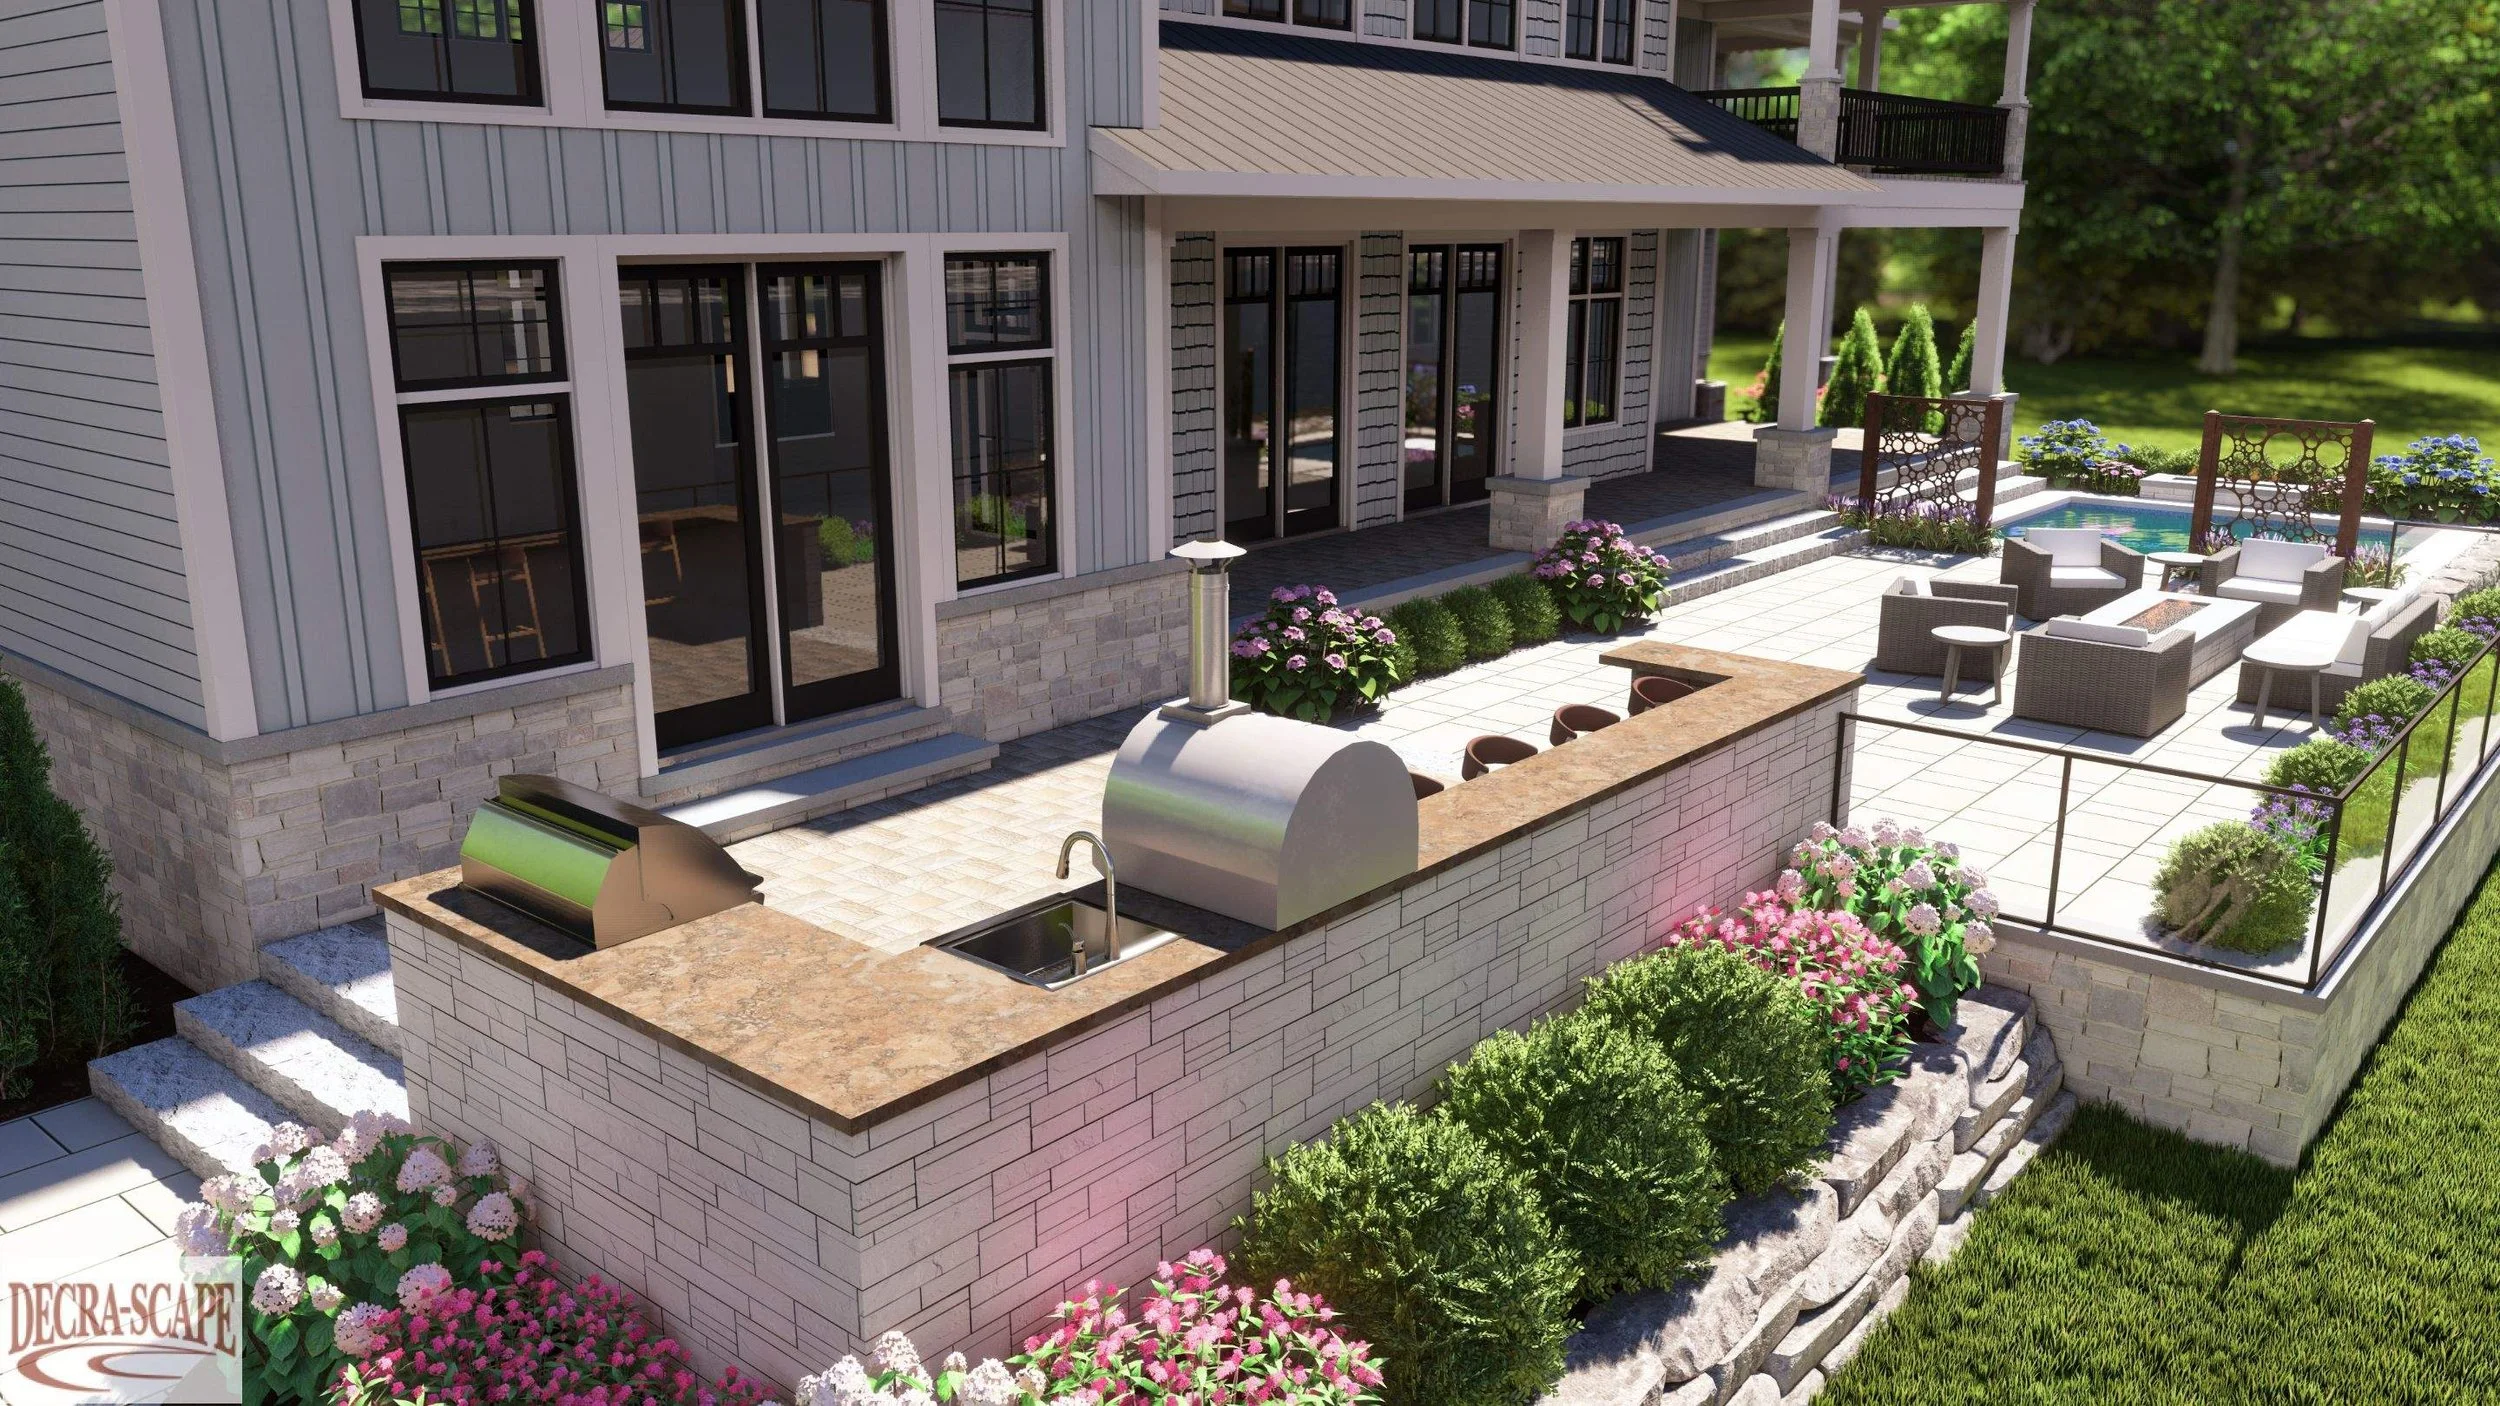
Bespoke Outdoor Kitchens and Dining: The Centerpiece Worth Investing In

When designed for multi-season function rather than summer novelty, an outdoor kitchen is often the single highest-ROI investment in terms of use and enjoyment.

Layout principle: Apply the indoor kitchen work triangle to outdoor conditions. Your grill, prep surface, and refrigeration should sit within a 10-foot triangle. Prevailing wind direction should inform grill placement: smoke blowing toward your dining zone kills the experience regardless of how beautiful the stone countertop is.

Material matrix: Leathered granite or porcelain countertops perform well against humidity, pollen, and freeze-thaw swings. Powder-coated aluminum and 304/316 stainless appliances resist corrosion and seasonal moisture. Thermally modified wood, high-end composites, or masonry cabinetry reduce long-term maintenance compared to traditional stained lumber.

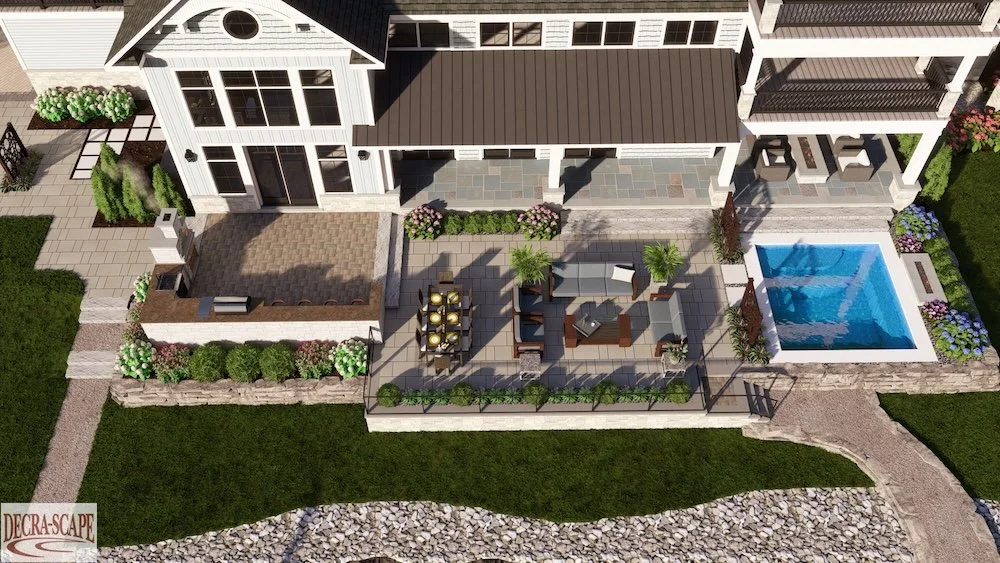
Luxury Poolside and Water Feature Design

Cabana design is where many pool projects lose coherence. A cabana that doesn't echo the main home's material palette looks out of place. Aim for similar stone species, trim color, or roof pitch, or the additional structure may read as an afterthought, regardless of what it costs. 

Naturalistic vs. geometric water features: Naturalistic water features (boulder waterfalls, koi ponds with planted margins, etc.) are beautiful. But it’s important to be realistic about your plans for maintenance, since such designs can require 3 - 4x more maintenance than geometric infinity edges or deck-level lap pools. Be honest about your tolerance before specifying. A neglected naturalistic water feature is worse than no feature at all.

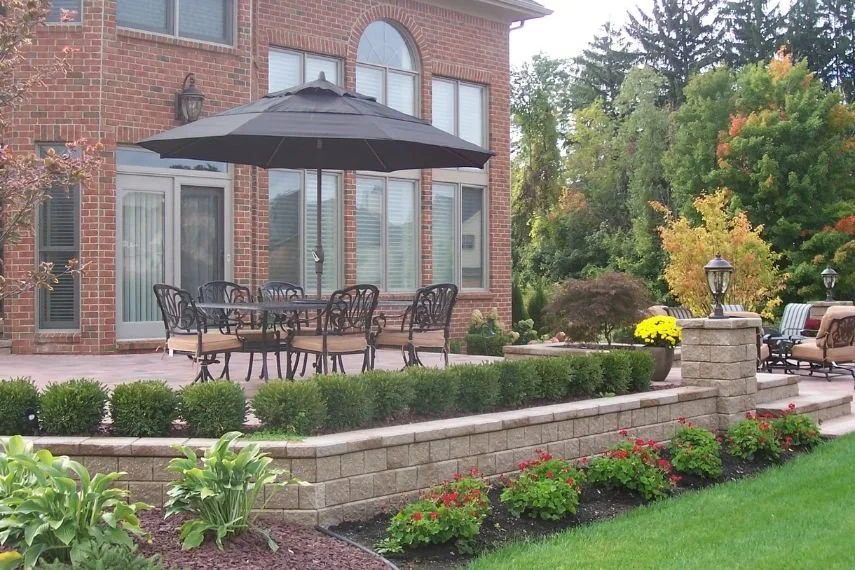
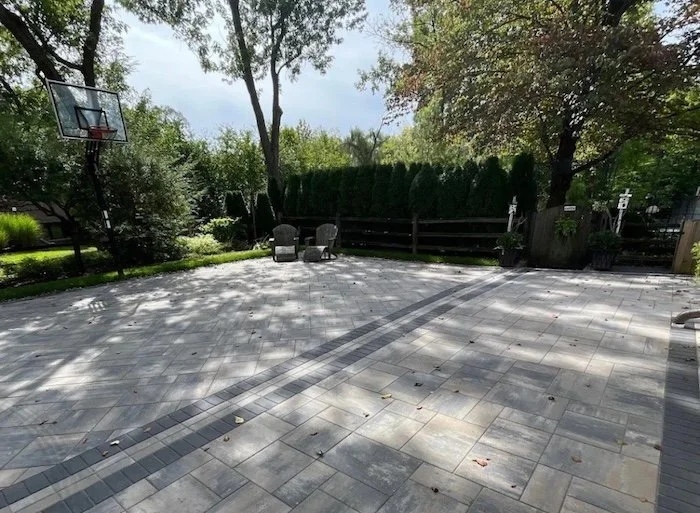
Privacy as design: Privacy is essential for yards with pools, and the options are vast. Stone or brick privacy walls create separation and seating while reinforcing the site’s architectural character. Pergolas or pavilions can add privacy and shade while functioning as dramatic focal points within the yard. Living screens of American Arborvitae do well in the southeast Michigan climate, and they often establish quickly while maintaining a softer, more natural look than traditional fencing. 

Lighting, Technology, and What’s Ahead

Layered lighting is non-negotiable: ambient (overhead or wall-wash), task (prep and cooking zones), and accent (uplighting specimen trees, grazing textured stone walls). One ratio that works well is 60% ambient, 25% accent, and 15% task.

Smart systems: Many homeowners seek app-controlled zoning, programmable scenes, and warm-dim transitions that allow outdoor spaces to shift naturally throughout the evening. This allows outdoor spaces to transition from brighter entertaining settings earlier in the evening to warmer, more intimate lighting later at night. Security integration (motion-triggered zone brightening) adds functional value without visible hardware.

Outdoor cinema: This is a standout backyard addition designed for making memories. Thoughtfully integrated outdoor cinema systems, including concealed audio, buried conduit runs, and retractable projection screens, allow entertainment spaces to remain visually refined even when the technology is not in use.

3 - 5 year trend forecast: Luxury outdoor spaces will likely continue moving toward quieter technology integration, including adaptive lighting scenes and weather-responsive irrigation. Sustainable best practices will continue to evolve, and demand for them will become more mainstream every day. Unique indoor/outdoor living spaces will grow in popularity; think fully integrated garden rooms that function as seamless extensions of the home.

How to Curate a Personalized Luxury Outdoor Space: A Process, Not a Shopping List

Start with lifestyle mapping. Document how you actually use outdoor space across all 4 seasons. Most clients discover that they use their outdoor space 60% less than expected, primarily because it wasn't designed around their real patterns.

Multifunctional elements earn their square footage: a dining table that converts to a fire table, a pergola with motorized louvers functions as a rain shelter and a shade structure, etc. Smart solutions signal thoughtful design.

The best outdoor spaces aren’t built from a checklist. They come from understanding how a family actually wants to live outdoors and designing around that from the beginning. When you’re ready to get started, we’re here to help.

What Is a Living Wall and Why Are More Homeowners Asking About Them?

Decra-Scape was recently featured in CAM Magazine for its role in delivering a reinforced soil slope live wall system at the University of Michigan Child Care Center. The article highlights the growing role of these systems in modern site development.

While that project was commercial in scale, the principles behind it are increasingly relevant for residential properties, especially where grade, drainage, and long-term performance all need to be considered together.


Every outdoor space is shaped by a combination of structure and environment. In some cases, that means solving for grade changes, drainage, or stability. In others, it means creating something that feels natural, integrated, and built to last.

Increasingly, homeowners are asking if they can do both at the same time.

What Is a Living Wall?

A living wall is a type of retaining system that supports soil while also allowing vegetation to grow directly within the structure itself.

Unlike traditional block retaining walls, which present a hard, uniform face, a living wall evolves over time. As vegetation establishes, the wall begins to blend into the surrounding landscape, creating a softer and more natural appearance.

But this is not simply a visual upgrade. When designed and installed correctly, living walls can:

  • Help manage stormwater more effectively when properly designed

  • Reduce surface heat buildup compared to hardscape surfaces

  • Support plant life and local ecosystems when vegetation is established

  • Integrate more naturally with surrounding grades and plantings

To better understand how this compares to more traditional approaches, it helps to look at the differences side by side.

A Practical Comparison for Michigan Conditions

Attribute Living Wall System (Reinforced Soil + Vegetation) Traditional Retaining Wall (Concrete / Block / Stone)
Initial Cost Higher up-front cost due to engineered system, planting, and drainage integration. Typically exceeds standard wall pricing. Variable but generally lower up-front cost per sq. ft. in SE Michigan, depending on material and site complexity.
Maintenance Requirements Moderate: vegetation establishment, seasonal trimming, and irrigation monitoring early on; stabilizes over time as plants mature. Low to moderate: periodic inspection for cracking, drainage issues, and joint repair.
Lifespan 50+ years when properly engineered and maintained (structure); vegetation evolves continuously over time. 50 - 100+ years for concrete/stone systems, depending on materials and installation quality.
Environmental Impact Positive when properly designed: can support biodiversity, reduce heat island effect, and improve stormwater absorption. Neutral when built with permeable materials and integrated landscaping.
Aesthetic Evolution Dynamic: becomes more natural over time as vegetation matures and fills in. More static: appearance remains largely unchanged after installation.
Drainage Performance High when properly designed: manages water through soil mass and planted face, helping reduce runoff pressure. Moderate to high: depends heavily on installed drainage systems (weep holes, backfill, drains, materials, etc.).
Freeze-Thaw Resilience High when engineered correctly; flexible system can accommodate movement and settlement. Varies by material: rigid systems (poured concrete) are more prone to cracking under freeze-thaw stress.
Response to Michigan Climate Flexible structure can help absorb movement from clay soils and freeze-thaw cycles when properly engineered. Requires precise materials, base prep, and drainage to avoid cracking, shifting, or heaving.
Installation Timeline Longer: requires structural build, planting phase, and establishment period. Shorter: standard systems can be installed relatively quickly, depending on size and access.
Long-Term Performance in Michigan Strong when properly designed and installed: combines structural support with environmental adaptability, especially in moisture-heavy conditions. Strong when properly designed and installed; performance depends heavily on drainage, base prep, and material selection.

Where Living Walls Make Sense in Residential Projects

Not every property requires a system like this. But in the right conditions, it can be a strong fit. We typically see interest in living walls when:

  • There are significant elevation changes across the property

  • A traditional retaining wall would feel too rigid or dominant

  • The goal is to create a more natural, landscape-forward environment

  • Drainage and long-term performance are key concerns

In these situations, the question becomes less about “can we hold this grade?” and more about how that solution integrates into the space long-term.

Where Living Walls May Not Be the Right Fit

While living wall systems offer a unique combination of structure and landscape integration, they are not the right solution for every property.

In residential settings, they are typically considered only in more complex site conditions. Situations where a traditional retaining wall may be more appropriate include:

  • Smaller yards with limited space or tighter budgets

  • Clients who prefer low-maintenance landscapes or are unwilling to maintain vegetation

  • Simple grade changes, particularly under 3 - 4 feet in height

  • Projects where speed of installation is a primary concern

In these cases, a well-built traditional retaining wall can often provide a more practical and cost-effective solution.

The key is aligning the system with the property conditions and the homeowner’s expectations over time.

The Structural Side (Simplified)

Behind the planted face, a living wall is still a highly engineered system.

It relies on reinforced soil, internal support layers, and careful installation to ensure long-term stability. The visible greenery is only one part of what makes the system work.

For most homeowners, the technical details are less important than the outcome: a structure that performs reliably without feeling overly built or out of place.

That said, proper design and installation are critical. Systems like these require a clear understanding of soil conditions, drainage, and load requirements to perform as intended over time.

A Recent Example in Practice

This approach was recently highlighted in a commercial project at the University of Michigan Child Care Center, where a reinforced soil slope live wall system was installed as part of the site development, with Decra-Scape leading the wall installation.

The project was featured in CAM Magazine’s 2026 Green Issue, recognizing both the structural performance of the system and its ability to function as a living landscape rather than a traditional retaining wall.

While that project was commercial in scale, the principles behind it carry over. The same balance of structure, flexibility, and environmental integration is what makes living wall systems increasingly relevant in residential settings.

Why This Matters for Homeowners

In Michigan, outdoor spaces are exposed to freeze-thaw cycles, shifting soils, and long-term wear. Any retaining solution needs to account for those realities.

Living wall systems offer an interesting alternative to conventional approaches by combining:

  • Structural reliability

  • Environmental performance

  • A more natural, evolving appearance

As Matt Caruso, owner of Decra-Scape, notes, “What makes this system powerful is its ability to combine structural integrity, long-term value, and environmental stewardship in one solution.”

Moving Forward

Proper evaluation early in the process is critical to determining whether this type of system is the right fit.

At Decra-Scape, the focus is always on aligning the solution with the property, the environment, and how the space will be used over time.

If you are evaluating options for a property with grade challenges or looking for an approach to retaining structures that brings an organic appeal, it’s worth understanding what systems like this can offer. Contact us with questions today

For more inspiration, check out our gallery of our work, read more on the blog, or catch up with us on Instagram

Step 1: Discovery, Where Vision Meets Professional Insight

Every exceptional outdoor space begins long before a sketch is drawn or materials are selected.

The first step is typically called “discovery” across the industry, but at Decra-Scape, it isn’t about checking a box. Rather, Discovery is a deliberate, experience-driven conversation designed to uncover the true vision and purpose behind your project.

From Waterford to Macomb, Grosse Pointe to Birmingham and surrounding Michigan communities, we’ve found that the quality of this first step directly impacts the success of everything that follows.

Over the past 3 decades, our disciplined process and custom approach have guided hundreds of exceptional hardscape projects across southeast Michigan, the vast majority of which consistently earn five-star client feedback. So in our book, the value of Discovery is unquestionable. 

But for our clients, it often feels new and unfamiliar. So here’s some background that can help:

The Foundation of Craftsmanship

Craftsmanship does not begin with stone placement. It begins with listening.

Discovery is where your vision is clarified, refined, and pressure-tested against real-world experience. It is where we determine whether your outdoor space requires structural correction, aesthetic enhancement, or a full transformation.

By the time we move into the Define phase, we are not guessing. We are building on a shared understanding.

What Discovery Is, and What It Is Not

First off, Discovery is not a sales pitch. It is a structured consultation that is led by your business development manager and focused on understanding:

  • The core motivation behind your project

  • Your long-term lifestyle goals

  • How you intend to use the space

  • Current frustrations with your property

  • Budget expectations and investment comfort

  • Timeline considerations

  • Decision-making dynamics within your household

We ask direct, experience-informed questions, because clarity at this stage prevents misalignment later. For example:

  • If you dream of an outdoor kitchen, we want to know how often you entertain and how you like to cook.

  • If drainage is an issue, we want to understand grading, soil conditions, and surrounding structures.

  • If an existing patio is cracked, we want to learn the background and context, to help identify what led to that failure.

You know your dreams best. But the context behind those dreams helps us design solutions that bring them to life and ensure they last. 

What a homeowner initially requests is an important part of the story, but also only one part of the full picture. In Michigan’s freeze-thaw climate, for example, proper base preparation and drainage are critical for hardscape longevity. 

Discovery helps us uncover such issues and define the scope of structural, functional, and lifestyle factors that will shape the process and outcome.

Identifying the Driving Force

At its core, nearly every project begins with either pain or aspiration.

Examples of pain points are:

  • Failing concrete or pavers

  • Poor drainage

  • Unsafe steps or walkways

  • A backyard that feels unused or unfinished

While aspirational examples might include:

  • Hosting extended family gatherings

  • Creating a refined outdoor entertaining space

  • Designing a fun and engaging backyard experience

  • Building a long-imagined outdoor kitchen

Understanding the driving force helps us design, plan, and build with clarity and proper intention.

Fit Matters, For Both Sides

Not every project is a fit for every firm. In fact, we have walked away from potential projects because we couldn’t deliver according to scope in the “Decra-Scape way.” It is during Discovery that the partnership is confirmed and better defined.  

During this phase, we assess:

  • Project scope and complexity

  • Site conditions

  • Client expectations

  • Investment range

  • Timelines

  • Material requirements

  • Level of collaboration desired

This ensures alignment before design resources are allocated.

For larger, custom hardscape projects, clarity at the outset reduces costly revisions later, protecting quality, schedules, and budget integrity.

What You Can Expect During Discovery

Your Discovery conversation typically includes:

  1. Project background discussion

  2. Photo or property review (when available)

  3. High-level budget conversation

  4. Timeline considerations

  5. Discussion of desired materials, such as Unilock pavers or natural stone

  6. Explanation of Decra-Scape’s structured process

Our goal is for you to leave this conversation with clarity on next steps, what documentation or measurements may be required, and whether we move forward to Define and Design.

This Is Only the Beginning

Discovery sets the trajectory for everything that follows. When this step is handled with precision and honesty, the Define, Design, Detail, Deliver, and DSI Care phases unfold with clarity and purpose.

Throughout each step of the Decra-Scape process, structured planning, disciplined design, and experienced project management come together to produce hardscapes built to last in Michigan’s climate.

If you are considering a project in Bloomfield Hills, Troy, Grosse Pointe, or surrounding communities, understanding the process is the first step toward building with confidence. And we’re ready to listen.

So if you’d like to begin your Discovery conversation, or if you have questions, contact us today.

Year in Review: Your Go-To Guide for Luxury Outdoor Living in Michigan

As this new year starts unfolding, we’re looking forward to what’s ahead. But we’re also reflecting with gratitude on the incredible clients we had the pleasure of working with over the past year, their gorgeous outdoor living spaces, and the wonderful time we’ve had engaging with all of you as we share insights, ideas, and inspiration on the exceptional craft of hardscape and landscape design, installation, and care.

In that spirit, we invite you to reflect with us on some of the top blog posts of 2025: 

The Ultimate Guide to Hardscape Maintenance

A beautifully designed hardscape deserves thoughtful care, particularly in the shifting climate of Southeast Michigan. From seasonal transitions to everyday wear, regular maintenance is essential to preserving the elegance and integrity of your outdoor living space. Explore expert advice on keeping your investment as enduring as it is beautiful.

 >> Ultimate Guide to Hardscape Maintenance and Repairs

Top 5 Things to Look for in a Contractor (From Pros Who Have Seen It All)

The right contractor doesn’t just build your space; they shape your entire experience. From initial consultation to final details, this guide helps you identify the qualities that signal true professionalism, craftsmanship, and care. Whether you're planning a refined patio, a custom outdoor kitchen, or a full landscape transformation, knowing what to look for in your hardscaping partner ensures your vision is in expert hands.

>> Top 5 Things to Look for in a Contractor (From Pros Who Have Seen It All) 

Backyard Fire Pit Ideas & Considerations

A fire feature can transform your backyard into a year-round retreat, but the best designs begin with thoughtful planning. From style and scale to safety and seating, this guide walks through the key considerations that make a fire pit not only beautiful, but seamlessly integrated into your outdoor lifestyle. If you're dreaming of a cozy outdoor space that draws people in and invites them to linger year round, start here.

>> Backyard Fire Pit Ideas & Design Tips for Any Landscape 

The Modular Outdoor Kitchen: A Flexible (and Quick) Option

Outdoor kitchens don’t have to mean long timelines or complex builds. Modular options offer a refined, efficient solution that blends flexibility with enduring style. This post explores how modular kitchens can be tailored to your space, pace, and aesthetic—all while delivering the signature craftsmanship Decra-Scape is known for.

>> The Modular Outdoor Kitchen: a Flexible (and Quick) Option

Elevating Outdoor Living with Luxury Paver Styles & Colors

The foundation of any elegant outdoor space begins underfoot. This guide to luxury paver styles and colors explores the textures, tones, and patterns that define high-end design, and how the right selection can elevate your entire landscape. Whether you favor timeless warmth or contemporary contrast, discover options that blend beauty with lasting performance.

>> Luxury Paver Styles & Colors to Elevate Outdoor Living 

The Value of Master Planning for Your Outdoor Space

Exceptional outdoor spaces don’t happen by accident. They’re the result of thoughtful, masterful planning. This article explores how a comprehensive design approach brings clarity, cohesion, and long-term value to your landscape investment. Learn how master planning ensures each outdoor element works in harmony with your home, your lifestyle, and the seasons.

>> The Value of Master Planning for Your Outdoor Space 

Best Driveways for Snow

In Southeast Michigan, a beautiful driveway must also be a practical one, especially in winter. This guide breaks down the best driveway materials and designs for managing snow and ice—without sacrificing curb appeal. Explore smart options that offer durability, safety, and elegance through every season.

>> Best Driveways for Snow & Snowy, Winter Conditions 

Looking Ahead

As we close the chapter on a remarkable year, we're grateful for the clients, collaborators, and readers who made it memorable. Your passion for refined, thoughtfully designed outdoor spaces continues to inspire everything we do.

In 2026, we look forward to sharing even more ideas, insights, and examples of the craftsmanship that defines Decra-Scape. Thank you for reading!

For continued inspiration, explore our gallery, dive deeper into the blog, or follow along on Instagram, and let’s imagine what’s possible together.

The Best Winter Salts for Your Patio, Walkways, and Landscaping

Choosing the right deicer matters more than most homeowners realize. Hardscape materials react differently to each product. Plants do too. A walkway that looks perfect in October can be permanently marked by March if the wrong salt gets used.

This is especially true in colder regions like Michigan, where temperatures swing, thaw cycles hit hard, and deicers are applied all winter long.

Those who understand salt types can protect their installations, reduce warranty issues, and help save money in the long run.

Here is a clear look at the salts you will encounter and how they compare.

What These Salts Mean for Your Hardscape Installations

You want materials that melt ice, protect your home, and preserve the integrity of the hardscape. Here's how each salt type actually behaves in real conditions.

Rock Salt (Sodium Chloride)

The most compatible option for concrete pavers and hardscape materials.

  • Least damaging to concrete materials according to the Concrete Masonry & Hardscape Association

  • Should be used whenever possible for concrete paver installations

  • Can cause plant damage due to sodium and chloride ions when it contacts vegetation

  • Most cost-effective option for hardscape protection

Read more for yourself: How salt works and overview of deicing chemicals—Minnesota Pollution Control Agency; University of Minnesota Extension

Calcium Chloride

Very effective in cold temperatures and fast acting.

  • Recommended by the Concrete Masonry & Hardscape Association when a quicker-acting deicer is necessary

  • Use judiciously on concrete pavers

  • Strong chemical profile that can affect metal components around the installation

  • Works well in extremely cold conditions where rock salt loses effectiveness

Magnesium Chloride

Not recommended for concrete pavers.

  • Can chemically degrade all types of concrete, significantly increasing potential damage

  • Studies show lower plant damage compared to sodium chloride

  • Despite being marketed as "safer," it poses greater risk to hardscape materials

  • Should be avoided on concrete paver installations

Potassium Chloride

Often used where plantings sit directly against walkways.

  • Less harmful to vegetation

  • Not reliable in very low temperatures

  • Limited effectiveness in Michigan's harsh winter conditions

CMA (Calcium Magnesium Acetate) and Acetate Products

Not recommended for concrete pavers.

  • The potential for damage from CMA increases with the amount of magnesium in the formulation

  • Can chemically degrade concrete materials

  • More expensive and sometimes requires higher application amounts

  • Despite being gentler on vegetation, poses risks to hardscape integrity

Read more for yourself: Watershed-friendly Deicing from Penn State Extension

What Makes a Salt "Hardscape Approved"?

As you can see, every product behaves differently on concrete pavers, natural stone, and the soil and plants around your walkway. The wrong salt can leave white stains on your patio, speed up surface wear, or burn nearby landscaping. The right one keeps paths safe without creating long-term damage.

That is why many contractors and manufacturers talk about certain products being "hardscape approved." It is not a marketing term. It is a way to help homeowners understand which deicers protect their investment and which ones increase the risk of avoidable repairs.

Material compatibility: Some salts accelerate surface scaling, spalling, or efflorescence. For concrete pavers specifically, rock salt (sodium chloride) is the least damaging option. Products labeled "safe for concrete pavers" or "safe for masonry" matter, but always verify recommendations against industry standards from organizations like the Concrete Masonry & Hardscape Association.

Landscape impact: Sodium chloride and calcium chloride can burn foliage and disrupt soil. Protect vegetation and metal from contact with deicing chemicals, as most can impair vegetation and corrode metals.

Cold-weather performance: Michigan winters require materials that actually melt ice during extended cold periods. Rock salt works for most conditions, with calcium chloride reserved for when faster action is needed.

Environmental considerations: While lower-chloride products may seem environmentally friendlier, the primary concern for hardscape installations is material compatibility. The best approach is using only as much deicer as needed to do the job.

Documentation: An approved product should come with MSDS sheets, application rate guidance, and surface compatibility notes. Always check recommendations from the Concrete Masonry & Hardscape Association for concrete paver installations.

Practical Recommendations for Michigan Hardscapes

It's common for homeowners to spread whatever salt they have on hand, but as we've seen, it's important you understand the real differences between your options.

For concrete paver walkways and patios: Rock salt (sodium chloride) should be your primary choice. It's the least damaging to concrete materials and most cost-effective.

For extreme cold conditions: Calcium chloride can be used judiciously when faster ice melting is necessary and temperatures drop very low.

For natural stone installations: Consult with your installer or manufacturer, as natural stone may have different compatibility requirements than concrete pavers.

Products to avoid on concrete pavers: Magnesium chloride and CMA-based products, despite marketing claims about being "safer," can chemically degrade concrete and should not be used on concrete paver installations.

Best Practices for Maintenance

Using the right ice melt is only part of protecting your patio or walkway during winter. How you maintain the area matters just as much. These are the key practices homeowners should follow to keep hardscape surfaces in good shape through the season:

Clear snow early to reduce how much salt is needed. Do not use deicing chemicals in place of snow removal. Reserve them for melting ice formed by freezing precipitation or freezing snow melt.

Apply only what is required. A key to successfully using deicing materials on concrete pavers is using only as much is needed to do the job. This maximizes benefits while minimizing damage to the pavers and surrounding environment.

Remove loosened snow and ice promptly. Once loosened, snow, ice, and excess deicing salts should be promptly removed by plow or shovel to avoid a buildup in concentration of the deicing chemicals.

Do not pile salted snow against retaining walls or planting beds. This protects both your hardscape structures and vegetation from prolonged salt exposure.

Rinse surfaces in spring to dilute remaining chloride and remove any residual deicing materials.

Avoid sand on permeable pavers. Do not use sand for traction on permeable interlocking concrete pavers. If used, sand must be removed with vacuuming in the spring to prevent surface infiltration. When winter traction is needed, jointing aggregate is a better alternative.

Ready to protect your patios and walkways with confidence?

For expert installation or maintenance of your hardscape, contact Decra-Scape today.

Best Driveways for Snow

driveway with pavers under tree

There are enough things to worry about in winter, including icy roads, frozen pipes, and endless snow shoveling. Your driveway might not be top of mind during winter, but it’s one of the most functional parts of your property. When it’s time for an upgrade, choosing materials suited to the area’s freeze–thaw cycles will determine how well it holds up through the season.

Such conditions can punish driveway materials, creating cracks, potholes, and dangerous surfaces. But choosing the right driveway material for these conditions can make a big difference in durability, safety, and peace of mind during the winter months.

Here are your options: 

Paver Driveways

Paver driveways look great, but also outperform nearly every other material in freeze-thaw conditions. Michigan’s constant temperature swings, moisture, and ice formation can wreak havoc on solid-slab materials like concrete and asphalt. But pavers are built for movement. Each individual unit can expand and contract naturally, relieving the pressure that causes cracking and heaving in other driveway types.

Learn about your paver color options.

Permeable pavers take that durability a step further. Their open-joint design allows water to drain through rather than sit on the surface, drastically reducing the risk of ice buildup. As one Decra-Scape expert explains, “Permeable pavers are an excellent choice for snowy climates due to their ability to manage water effectively and reduce ice formation.”

Beyond their structural benefits, paver driveways are easier to maintain. If a section ever settles or becomes damaged, you can replace individual pavers without tearing out the entire surface (something impossible with poured materials). That keeps long-term costs lower and extends the life of your investment.

Snow removal is also simple. Just use a rubber-tipped shovel or plow to avoid scuffing the surface. Many homeowners also choose to integrate snow-melt systems beneath their paver driveways for the ultimate in winter convenience.

Natural Stone Driveways

For homeowners seeking a more natural look, natural stone—especially bluestone—offers both beauty and resilience. Properly installed on a compacted base with jointing sand or polymeric sand, bluestone can withstand heavy snow loads without cracking or spalling.

While bluestone typically costs more than concrete pavers, it offers a unique aesthetic and a surface texture that provides excellent traction in icy conditions. With proper installation and maintenance, these driveways can last decades while maintaining their color and strength.

Concrete Driveways: Common but Prone to Winter Damage

Concrete remains a common driveway material in Michigan, but it’s not always the best fit for areas exposed to constant freeze-thaw cycles. The solid-slab design that gives concrete its smooth appearance also makes it vulnerable to cracking as temperatures swing between freezing and thawing. Once moisture seeps in and freezes, those cracks expand and worsen with each cycle.

Proper installation can help delay these issues. And using an air-entrained mix and a compacted base improves durability, while regular sealing slows down moisture absorption. But even well-built and maintained concrete surfaces eventually succumb to Michigan’s climate. 

As Decra-Scape experts note, “Proper installation, sealing, and maintenance of a concrete driveway are essential for long-term performance, especially in regions with heavy snow. But paver driveways are still preferable.”

By comparison, paver driveways naturally eliminate many of the risks concrete create. Their interlocking design allows movement without cracking, and individual pavers can be replaced easily if damage ever occurs. Plus, pavers offer better drainage through their joints, preventing water from pooling on the surface. This provides a major advantage during snowmelt and refreezing periods.

For homeowners focused on long-term durability, appearance, and easier winter maintenance, pavers are the smarter alternative to poured concrete.

Asphalt Driveways: Quick Fix, Short Lifespan

Asphalt driveways are popular in the Midwest, because they’re relatively affordable and easy to install. Their dark color also helps absorb sunlight, which can melt snow and ice a bit faster on sunny winter days. But while asphalt performs better than concrete when it comes to flexibility, it’s still not a long-term solution for Michigan’s freeze-thaw cycles.

Repeated temperature swings cause the asphalt to soften and harden, eventually leading to surface cracking and potholes. Harsh de-icing salts and heavy plow use accelerate wear even more. Regular sealing can slow this process, but it adds ongoing maintenance costs every few years, and even then, resurfacing is often required after about 15 years.

Paver driveways, by contrast, don’t deteriorate the same way. The segmented system allows natural movement without cracking, and permeable options drain meltwater instead of trapping it beneath the surface. Snow removal is easier too, without worry about tearing up soft asphalt during early spring thaws.

So while asphalt can serve as a budget-friendly choice in the short term, pavers provide the long-term durability that boosts value over the life of the driveway, as well as the visual appeal that Michigan homeowners ultimately prefer.

Gravel Driveways: Budget-Friendly but High Maintenance

Gravel driveways appeal to homeowners looking for a low-cost solution that drains well in winter. Because gravel allows meltwater to pass through freely, it avoids many of the pooling and refreezing issues seen with solid surfaces. It also won’t crack under freeze–thaw stress, making it a practical short-term option.

However, that affordability comes with tradeoffs. Snow removal is more difficult, as shovels and plows can easily push gravel off the surface, leaving uneven patches that require constant raking and replenishment. Even with careful maintenance, gravel tends to shift over time and can track onto surrounding walkways or landscaping.

For homeowners who want a long-term, visually appealing surface that handles Michigan winters without the mess, pavers offer far more value. Their interlocking design provides the same drainage benefits as gravel while delivering strength, structure, and a finished look that enhances curb appeal year-round.

Heated Driveways: The Ultimate Winter Upgrade

For homeowners who want complete peace of mind during Michigan winters, a heated driveway can be paired with pavers or natural stone for unmatched performance. These systems use either electric heating cables or hydronic tubing installed beneath the surface to automatically melt snow and ice, keeping your driveway clear and safe without lifting a shovel.

When combined with pavers or bluestone, a snow-melt system offers unmatched durability and convenience. Pavers allow for easy access to the heating elements if maintenance is ever needed, and their modular design distributes heat evenly across the surface. Natural stone retains warmth longer, helping the system run efficiently and reducing operating costs.

On average, a well-installed heated driveway lasts 20 to 30 years with minimal maintenance. Occasional checks of the system’s components are all that’s needed to ensure peak performance. 

Although installation costs are higher upfront, many Michigan homeowners see a heated driveway as a smart investment due to its long-term benefits, which include

  • Fewer slip hazards

  • No de-icing chemicals

  • Zero manual snow removal

Whether installed under a new paver or bluestone driveway, a heated system can help protect your driveway while eliminating danger as well as one of winter’s biggest chores.

Getting Started with Your New Driveway

When selecting a driveway material, think about your budget, maintenance preferences, and the specific challenges posed by your climate. Each material has its strengths, but with the right care and preparation, any driveway can weather the winter months effectively.

Ultimately, the best driveway for snow is one that fits your lifestyle and keeps your property safe and accessible year-round.

Ready to discuss a driveway built to handle Michigan winters? We’d love to discuss the options with you

The Value of Master Planning for Your Outdoor Space

No matter how many times you see it happen on your favorite home makeover show, creating the outdoor space you’ve always envisioned doesn’t usually happen all at once. Many homeowners today take a phased approach, spreading projects across multiple seasons or even years. 

This master planning process allows for careful budgeting, better project flow, and a finished landscape that looks cohesive and functions exactly as it should.

What Is Master Planning?

Master planning is stepping back and creating a clear vision for your property before breaking ground. It goes beyond a design sketch, and functions as a roadmap that accounts for your goals, the logistics of construction, and how each element of the project fits together.

A typical phased roadmap might look like:

  • Phase 1: Core structural work such as patios, retaining walls, or grading

  • Phase 2: Walkways, irrigation, and planting beds to connect and soften the hardscape.

  • Phase 3: Enhancements like lighting, outdoor kitchens, or water features.

By investing in a master plan, you can spread costs over time without sacrificing the integrity of the finished product. And instead of piecemeal projects that may not align down the road, you’ll have a sequence designed to maximize efficiency, minimize disruption, and protect your investment.

Phasing Projects Strategically

When projects are phased, order of precedence matters. 

This is easiest to understand by way of example:

Say your vision includes both a patio and a walkway, but the walkway will ultimately be the only access point. In this case, it would be best to build the patio first. Otherwise, the heavy foot traffic of patio construction could damage the brand-new walkway. 

Makes sense, right? But it’s rare that a homeowner knows to take such considerations into account without a master plan and an expert partner to bring experienced advice to the planning table from the outset.

Here are some additional examples that come up frequently in the master-planning process:

  • Install irrigation before sodding or planting beds, so you don’t tear up finished areas later.

  • Build retaining walls before patios to stabilize soil and avoid shifting.

  • Run conduit for lighting or sound before laying pavers, so you don’t have to cut through stonework.

Such strategic decisions are where professional guidance makes the difference. At Decra-Scape, our team helps align your ideas with the practical needs of installation, so the finished landscape is both beautiful and built to last.

Project Management Considerations

Master planning is about design, but it’s also very much about logistics. Key elements include:

Permitting

Municipal approvals can take weeks or months, depending on your city’s process. Getting ahead of this step avoids delays once you’re ready to build.

Budgeting

With a phased plan, you’ll know what to expect financially in each season, giving you confidence to move forward with fewer surprises.

Scheduling

Spring is the busiest time for landscape construction. By securing your spot early, you’ll gain peace of mind, lock in your timeline, and give your team the bandwidth to bring extra creativity to your project.

A professional landscape team doesn’t just think about how your outdoor space will look today; they anticipate how each step will affect the next. From avoiding construction traffic across finished work to coordinating permits and inspections, master planning is an important process that requires expertise and foresight.

The Master Planning Process

A systematic approach ensures clarity, collaboration, and craftsmanship at every stage. Here’s a snapshot of how that process typically unfolds:

Step 1: Discover

The first step is understanding your goals. What’s driving your project? A crumbling patio that needs replacing, or a long-held dream of an outdoor kitchen? Through thoughtful questions and open discussion, the initial consultation sets the foundation for your vision.

Step 2: Define

Once the vision is clear, it’s time to outline goals and requirements. This phase balances homeowner input with professional guidance, ensuring the resulting plan accounts for both form and function. The outcome is a detailed outline that sets the stage for design.

Step 3: Design

This is when ideas come to life. Using renderings, drawings, or even 3D models, designers translate the plan into something you can see and react to. Collaboration is key as concepts are refined until the design feels right and ready for approval.

Step 4: Detail

With the design approved, specifics are confirmed. Materials, colors, styles, and dimensions are locked in. This step ensures that every choice aligns with your vision and that the project timeline is mapped out clearly.

Step 5: Deliver

Construction begins. Materials are ordered, schedules set, and the build is underway. At this stage, the project shifts from concept to reality as each element of your outdoor space takes shape.

Step 6: Care

A landscape is a living investment. Once construction wraps up, ongoing care and maintenance protect that investment, keeping the finished project looking and functioning as intended for years to come.

Start Master Planning Today

If you’ve been considering upgrading your outdoor space, the first step is creating a plan. By working with Decra-Scape, you’ll not only define your long-term vision, but also phase it out in a way that fits your budget, timeline, and lifestyle. 

The result: a cohesive, high-quality landscape that grows with you season by season.

Have more questions about master planning? We’d love to discuss the options with you

Elevating Outdoor Living with Luxury Paver Styles & Colors

The details make all the difference in outdoor design, with the right paver selection setting the tone for the entire space. Luckily, luxury pavers come in a wide range of styles and colors, giving homeowners the flexibility to design an outdoor environment that reflects personal taste while also adding long-term value to the property.

Defining Luxury in Pavers

What do we mean by “luxury” pavers? They are those that stand out through quality materials, precision finishes, and a wide variety of design options. They are manufactured to deliver durability while maintaining rich, consistent color and texture. Many premium lines also include features like stain resistance, slip resistance, and integrated spacers for clean, uniform joints.

Popular Luxury Paver Styles

Classic Elegance: Traditional Stone Look

For timeless appeal, many homeowners choose pavers that mimic natural stone. Options include tumbled finishes that create an aged appearance or finely textured surfaces that replicate slate or bluestone. These work well for traditional landscapes, front entries, or formal garden settings.

Modern Minimalism: Sleek and Smooth

Contemporary designs often feature large format pavers with smooth, clean lines. These create a streamlined look perfect for modern homes. Rectangular slabs in oversized dimensions can make small spaces feel more expansive and highlight architectural geometry.

Learn more about smooth vs. textured pavers

Rustic Charm: Weathered and Textured

For outdoor spaces meant to feel warm and inviting, rustic styles are a strong choice. Cobblestone patterns, hand-chiseled edges, and rough textures add character and a sense of history. These are often chosen for backyard retreats, outdoor kitchens, or pathways that wind through gardens.

Pattern-Ready: Modular Designs

Luxury paver collections frequently include sets of different sizes designed to be installed in repeating or random patterns. This adds visual interest and creates a “custom” look without requiring custom fabrication. Popular options include herringbone, basket weave, and multi-piece modular layouts.

Color Palettes that Define Outdoor Spaces

Earth Tones

Beige, tan, and warm brown hues bring a natural connection to surrounding landscapes. Earth tones work well for properties with traditional architecture and pair easily with wood, brick, or stucco.

Greyscale Sophistication

Charcoal, slate, and light grey shades are increasingly popular for modern spaces. These neutrals provide contrast against lush landscaping and complement metal, glass, and contemporary siding.

Blended and Variegated Tones

Luxury pavers often feature blended colors, mixing multiple shades within a single stone. This creates depth, reduces the appearance of stains, and makes each installation unique. Blended tones are versatile enough to work in both rustic and modern settings.

Bold Accents

Deep reds, rich blacks, or even cool blues can be used as border pavers or design accents. These help define gathering areas, highlight walkways, or tie in with other architectural elements.

Designing with Luxury Pavers

Choosing the right pavers isn’t just about looks. It also influences functionality and longevity. Lighter colors can help keep pool decks cooler, textured surfaces improve traction, and modular designs can minimize waste during installation. A professional hardscape designer will evaluate the property layout, sunlight, and intended use of the space before recommending the best options.

To explore your options for outdoor kitchen design, please get in touch.

The Modular Outdoor Kitchen: a Flexible (and Quick) Option

For years, adding an outdoor kitchen meant construction and deep digging. Worth it? Absolutely. Such custom outdoor kitchens are still a perennial favorite and an excellent choice for many homeowners. But the modular outdoor kitchen now also offers another great option—and one with a surprising degree of flexibility. 

These new systems are lightweight, customizable, and quick to install. For those looking to upgrade an existing patio or complete their project in a shorter timeline, a modular outdoor kitchen can be a great choice—and one that offers many of the aesthetic and functional benefits of a traditional build.

Compare: How Traditional Outdoor Kitchens are Built

A custom outdoor kitchen is built from the ground up—just like your home. Using block, stone, and concrete layered over steel frames, these kitchens are permanent structures tailored to the specific layout, architecture, and aesthetic of your outdoor space. That level of customization allows for maximum creativity in design and material selection, with endless possibilities for layout, finishes, and built-in features.

Because of their structure, custom kitchens often require a reinforced base, which can mean additional planning and prep work—especially if you're adding one to an existing patio. The result is a fully integrated, architectural focal point designed to blend seamlessly with the rest of your landscape.

Custom kitchens are ideal for those seeking a long-term, built-in solution. They're especially well-suited to homeowners who want to match unique hardscape materials, accommodate specialty appliances, or incorporate additional masonry features like seat walls, fireplaces, or pergolas.

How a Modular Outdoor Kitchen Is Different

A modular outdoor kitchen is built from lightweight aluminum frames and cladding panels. These materials are durable, weather-resistant, and relatively easy for a professional team to install.

High-quality modular systems often use marine-grade aluminum framing, which won’t rust, rot, or warp, making them well-suited to four-season exposure or harsh environments.

Most modular systems are designed to sit directly on your existing patio. No digging. No cutting. No need to tear up the space you’ve already invested in. Additional design elements can help create the look of a custom kitchen, but with modular elements. (More on this below.) 

Plug-and-play flexibility has made modular kitchens a fast-growing trend in outdoor living. And the benefits go well beyond weight.

Installed in a Single Day

Many modular kitchen setups can be installed in just one day—fully assembled on-site, complete with features like grills, storage, countertop space, and more. And your crew won’t need to demo or alter the patio surface in order to set it up.

True, should you choose certain options—such as those that require a gas line, sink, drains, etc.—some digging will be necessary during the project. But as long as you select a quality contractor such as Decra-Scape, every detail will be handled with precision and care: a turn-key operation. All you need to do is choose your options, and we’ll bring your vision to life.  

Custom Fit, Inch by Inch

Modular outdoor kitchens are designed to work with the space you already have. Instead of forcing a design to fit a rigid footprint, these systems are built to the inch. 

That means we can create a layout that flows around a fire pit, lines up with an edge of your patio, or mirrors an existing retaining wall. No awkward gaps. No oversized corners. Just a clean, intentional design that looks like it was meant to be there from the start.

Built-In Look

Once installed, the kitchen can be finished off in a few different ways. For clients who want a built-in appearance, we’ll typically custom-build a border of pavers or stone around the base. This helps create the impression of a custom build. Additional hardscape elements can be added as well, such as a bartop area or covered pergola or pavilion. 

And if you don’t care to commit to a more permanent look, you can opt to keep things simple and place the modular kitchen directly on your patio. With this approach, you could even move or expand your kitchen in the future. 

Not Just for Existing Patios

Originally, modular kitchens made the most sense for existing patios, where digging wasn’t practical. But more and more homeowners are choosing a modular outdoor kitchen from the start of their hardscaping project. 

Here’s why:

  • No waiting on concrete or footings

  • Easy to adjust layout post-install

  • Faster timelines

  • Lower risk if plans change mid-project

With this option, you can also more easily work in phases: Design your patio today. Install the kitchen next week. Or next year. You’re not locked into a single layout or construction phase.

Prefab, But Not Pre-Made

Unlike the term “prefab” suggests, these kitchens don’t come in one-size-fits-all kits. Everything is modular, yes, but also customizable. So you can dial in the dimensions to your liking, making it easy to tailor the setup to your patio. 

Want a stone look? You’ve got it. Prefer sleek metal or warm wood tones? Those are options too. And these aren’t locked systems. So you’re free to expand over time. Consider the following options:

  • Grills

  • Side burners 

  • Drop-in power burners 

  • Kegerators 

  • Refrigerators 

  • Sinks

  • Custom storage 

  • Trash receptacles 

  • Ice chests

  • Piza ovens 

  • Bar-top seating 

  • Beverage centers

  • And more

How to Know if a Modular Outdoor Kitchen Is the Right Choice

This approach checks a lot of boxes. It’s perfect for:

  • Homeowners with finished patios who want a no-dig outdoor kitchen

  • Someone seeking a kitchen design to fit their specific needs and timelines

  • Anyone who values flexibility or wants to grow their setup over time

  • People interested in a lower-labor solution

It’s also a solid choice if you’re planning in phases: start small now and add more later without the need to undo or redo stonework.

Final Thoughts

A modular outdoor kitchen offers the speed of prefab with a surprising degree of polish. You skip the digging. You avoid construction. And you still enjoy quality and customization.

Whether you're retrofitting an existing space or designing a new one, this is a practical and scalable way to upgrade your backyard. Let the cooking begin!

To explore your options for outdoor kitchen design, please get in touch

Backyard Fire Pit Ideas & Considerations

Don’t let your yard stop you—a backyard fire pit is always a great idea, whether your yard is flat, sloped, or somewhere in between. And while sloped terrain can offer unique design opportunities (and challenges!), any outdoor space has the potential to be transformed into a cozy, memorable gathering spot with the addition of a fire pit.

No matter if you’re working with an open lawn or an uneven incline, we have a host of ideas and tips that can help you create a stunning fire pit area that complements your landscape and lifestyle:

Ideas for Fire Pit Designs

Terraced Fire Pit Retreat

Terracing your backyard—whether to manage a slope or simply create design depth—is a great way to carve out distinct zones. Think a lower level for the fire feature, a middle level for seating, and an upper level for lounging or dining. Use materials like stone, concrete, or wood to define each tier and add texture to the space.

As backyard experts, Decra-Scape’s team members have significant experience incorporating your fire pit into a terraced landscape: "A well-designed retaining wall not only provides structural support but also enhances the aesthetic appeal of a fire pit area. Choosing high-quality materials like natural stone can make all the difference in creating a long-lasting feature."

Sunken Fire Pit with Built-In Seating

A sunken fire pit can add a dramatic, intimate feel to your backyard, especially when surrounded by built-in seating. If you’re digging into a slope or creating depth in a flat yard, enclosing the space with stone or concrete walls gives the fire pit area a distinctive, set-apart appeal. Add cushions or pillows to help bring the comfort and style of the indoors out into your yard. 

Elevated Platform Fire Pit

Want to make a statement? A raised platform or deck is an eye-catching option that works well in any setting. It provides a stable surface for your fire pit and offers elevated views of your surroundings. Just be sure to include proper safety features like railings and lighting.

Fire Pit with Retaining Wall Seating

A retaining wall around the fire pit can be both a structural and functional element. Whether you’re managing a slope or defining a space, retaining walls made of stone or concrete blocks double as built-in benches, making it easy to accommodate guests.

Stone Step Pathway to Fire Pit Area

Create a sense of arrival with a stone step pathway leading to your fire pit. This approach works exceptionally well if your yard has natural elevation changes. But even in more flat spaces, a few steps or small pathways add a polished, inviting touch. Bonus: steps can serve as overflow seating during gatherings.

Learn more about curved paver pathway patterns

Tips for Enhancing the Fire Pit Area

To make your fire pit feel like a natural part of your backyard, consider these design upgrades:

Landscaping: Add plants, shrubs, or hardscape elements to frame the fire pit and soften the space. Low-maintenance greenery works best.

Lighting: For twice the impact, use string lights, path lights, or built-in LEDs to ensure the space is safe and usable after dark.

Fire Pit Materials: Choose durable, heat-safe materials like fire-rated brick, stone, or metal for longevity and peace of mind.

Extra Features: Add a wood storage nook, built-in bench, or grill attachment for additional functionality.

Drainage: Decra-Scape’s planning team adds this important tip: "Proper drainage is crucial for any fire pit installation. A gravel base and well-placed drains can help prevent water pooling and extend the life of your fire pit area."

Bringing Your Vision to Life

A backyard fire pit is truly a lifestyle upgrade. From intimate nights by the fire to s’mores with the kids, it’s a space where memories are made.

Are you ready to discuss fire pit designs, materials, or placement? We’d love to discuss the options with you

For more inspiration, check out our gallery of our work, read more on the blog, or catch up with us on Instagram

Top 5 Things to Look for in a Contractor (From Pros Who Have Seen It All)

If you’re a Michigan homeowner thinking about investing in a paver patio, outdoor kitchen, or other outdoor-living feature, finding the right contractor can make or break your project. But as experts who have worked in hardscape and landscape design and construction for decades, we can tell you: not all contractors are created equal. 

Honestly, that upsets us, because we’re firm believers that quality of work and integrity of service are important for our industry as a whole. So we’re here to help you identify a great contractor—no matter who you choose to work with. Here are 5 things to look for: 

1. Proper Licensing & Insurance (Don’t Skip This)

This step is no secret, but many just treat it as a formality. A better way to look at it? It’s your financial protection. 

In Michigan, a contractor doing work over $600 must be licensed through the Michigan Department of Licensing and Regulatory Affairs (LARA). You can search license status online using the contractor’s name or business ID.

Also, ask to see a Certificate of Insurance, and don’t just take a verbal "yeah, we're covered" as due diligence. That certificate should show both general liability and workers’ compensation policies in effect. Don’t be shy about calling the insurance provider listed to confirm the coverage is active.

Did you know that if  someone gets hurt on your property or your home is damaged during the project, you could be held liable if the contractor isn’t properly insured?

Green light: The contractor provides their Michigan license number, carries active liability and workers’ comp insurance, and even offers to let you verify it. 

Red flag: They say “we’re covered” but can’t produce documentation, or the license doesn’t check out online.

2. Experience With Michigan Soils and Seasons

Hardscaping in Michigan isn’t like Arizona or the Carolinas. Here, homeowners can deal with challenges like freeze-thaw cycles, clay-heavy soils, drainage challenges, and the kind of winters that can tear apart a poorly built patio. 

You need someone who knows how to dig below the frost line, install the right base materials, and account for water movement—not someone learning on the job (and on your dime).

This is also where references come in (more on that below). Ask the contractor if they’ve done work in your specific area or neighborhood. Bonus points if they can name past clients, talk about local soil quirks, or share how their builds have held up through Michigan winters.

If they just moved into town or can’t speak confidently about regional conditions, it’s worth pressing pause.

Green light: They talk confidently about local soil types, frost lines, drainage issues, and have references nearby with projects that have survived multiple Michigan winters.

Red flag: They just moved into the area or can’t explain how they build differently for our climate.

3. Clear, Detailed Estimates (No Guesswork)

A solid contractor should give you a written estimate that breaks everything down: materials, labor, timeline, payment terms, and what’s included vs. what’s not. That means you should see things like square footage, type of pavers, base materials, edge restraints, cleanup costs—not just a single line that says: “Paver patio: $12,000.”

That kind of vague quote? Major red flag. It leaves too much room for surprises later—whether it’s extra charges for excavation, unexpected delays, or disagreements over what was actually included.

Green lights:

  • A highly detailed proposal that outlines what is and is not included in the project

  • Estimated start and finish dates

  • Payment schedule (e.g., deposit, progress payments, final balance)

  • Details on prep work, base depth, drainage considerations, etc.

Red flags:

  • Verbal estimates only

  • No contract or just a one-sentence “scope of work”

  • Vague or missing payment terms

  • Pushback when you ask for details in writing

A trustworthy contractor won’t hesitate to put everything in writing, and walk you through it line by line.

4. Portfolio & Local References

Ask to see photos of recent work, ideally projects that are similar to yours in scope and size, whether it’s a backyard patio, front walkway, or full outdoor living space.

A good contractor should have no problem sharing a portfolio (even just on their phone) and offering local references you can actually call. 

Bonus points if they have a working website that they’re proud of. And don’t be afraid to ask about the projects featured on their website! If they can’t answer, they might be using other business’s photographs. 

But don’t stop there. Do a little of your own detective work:

  • Google their business name + your town or “reviews”

  • Look at Google Maps reviews for both feedback and project photos

  • If they’re on Instagram or Facebook, scan their recent posts and see how active they are, and if the projects look legit

When talking to references, go beyond “Were you happy?” Ask:

  • Did they stick to the schedule and budget?

  • How was the communication throughout the job?

  • Do they clean up well after a day’s work?

  • Has the project held up through Michigan’s seasons?

Green light: A contractor who has done work in your neighborhood and is proud to show it off.

Red flag: A contractor who is hesitant to share photos or only gives vague references that don’t check out.

5. Communication & Professionalism (It Matters)

This one is underrated, but it’s often the difference between a smooth project and a stressful one. Pay attention to how the contractor communicates before you sign anything. Are they responsive to calls or texts? Do they show up when they say they will? Do they take time to answer your questions, or brush you off with vague answers?

If communication is messy or spotty at the start, it usually doesn’t get better once the job is underway.

Green lights:

  • They reply to calls, emails, or texts within 24 hours

  • They show up to your estimate appointment on time (or give you a heads up if they’re running late)

  • They walk you through the process clearly and answer questions without rushing you

  • You get a sense that they’re organized and genuinely care about your project

Red flags:

  • Multiple no-shows or last-minute cancellations without explanation

  • Takes days to respond (or only texts at odd hours)

  • Gets defensive or vague when you ask about timelines, materials, or process

  • Blames other customers for delays or talks negatively about past clients

You’re trusting this person with your home and your money; they should treat your project like it matters.

Have more questions about finding a contractor or about your backyard project in general? We are happy to answer questions and provide further guidance

Backyard Layout Planner Guide: How to Build the Foundation for a Truly Custom Outdoor Space

At Decra-Scape, we don’t believe in copy-paste landscaping. Every yard has its own story to tell, and the backyard layout is where that story begins. Whether you’re thinking about a large-scale outdoor living area, a new patio, or trying to make better use out of a sloped yard, the planning phase is where good design meets long-term functionality.

So, we’re walking through what real backyard layout planning looks like, what tools can help, and how a local landscaping company can take your initial ideas and turn them into spaces built to last.

Why a Thoughtful Backyard Layout Matters More Than You Think

We often meet homeowners who already have strong ideas about what they want—a fire pit here, a seating wall there. But when we ask, “How do you use the space now?” or “Where does the sun hit in the evening?” the picture starts to shift. 

That’s the purpose of layout planning: not just placing features but creating outdoor zones that actually work for your home, your habits, and southeast Michigan’s unique climate.

A good layout considers:

  • How foot traffic flows from house to yard

  • Elevation changes and drainage

  • Where sunlight hits throughout the day

  • Views (what to highlight and what to screen)

  • Noise (both blocking it out and containing it)

  • How people gather, move, and relax in the space

That’s why every project should start with a conversation. Then sketch, refine, and adjust until every element has purpose, and presence.

Backyard Layout Process: From Concept to Customization

Here’s a snapshot of some steps in layout planning, and how it fits into the design process:

Site Visit & Measurements

The first step in layout planning is evaluating the physical characteristics of the property. Accurate measurements of the yard’s dimensions, slope, and grade are essential to ensure proper drainage and structural longevity. 

This phase also involves assessing elements such as existing vegetation, buried utilities, hardscape features, and the home’s architectural lines. Even small variations in elevation can influence water flow, usability, and how outdoor elements are integrated. 

Special consideration is given to mature trees, access points, and sunlight patterns throughout the day. In sloped yards, solutions like retaining walls, terracing, or step transitions may be explored.

Learn more about segmental retaining wall ideas

Client Consultation

A successful backyard layout plan begins with a clear understanding of how the space will be used. Will it need to accommodate frequent gatherings, daily relaxation, pets, or children? Preferences around privacy, shade, maintenance, and aesthetics are also discussed at this stage. 

This input helps guide key decisions regarding zoning, material choices, and long-term durability. Lifestyle factors—such as how often the space will be used, what time of day, and during which seasons—are factored into the design strategy. These insights ensure that the final layout not only fits the yard, but also fits the people using it.

Conceptual Layout

The conceptual layout transforms observations and input into a working design. This phase includes the creation of scaled drawings that define zones for specific functions—outdoor kitchens, lounge areas, fire features, gardens, play spaces, etc. 

It also takes into account transitions between zones, flow of movement, and the visual balance of structural elements and open space. Material selection begins to take shape here, as textures, tones, and surface patterns are coordinated with the home’s architecture and the site’s natural features. 

Proper layout planning can also incorporate early lighting and irrigation considerations, to help avoid retroactive adjustments during construction.

Visualizations & Revisions

Scaled layouts are often brought to life through 2D or 3D renderings, offering a realistic preview of how the finished space will look and function. These visual tools help uncover design challenges early—such as furniture spacing or shade conflicts—and allow adjustments before any construction begins. 

This step is also crucial for fine-tuning proportions, ensuring the layout feels cohesive when installed at full scale. Renderings often include color, textures, and even lighting scenarios to communicate ambiance. Multiple rounds of revisions can be part of this process, with feedback integrated until the plan aligns perfectly with expectations.

Read our Ultimate Guide to Patio Textures

Build Plan Integration

Once finalized, the layout becomes the blueprint for execution. Construction drawings provide precise measurements and technical details that guide excavation depth, material transitions, joint spacing, and drainage solutions. These documents eliminate guesswork, streamline communication among installation crews, and ensure the finished space matches the intended design. 

Proper integration of the layout with the build process helps avoid costly mid-project changes and ensures material efficiency. When done right, the handoff from planning to construction is seamless—allowing for high-quality installation that’s both visually striking and built for long-term performance.

What About Online Backyard Layout Tools?

We’re sometimes asked if tools like iScape or Planner 5D are worth trying. The answer is: yes, with the right expectations.

These platforms can help you:

  • Experiment with different patio shapes and placements

  • Get a rough sense of size, scale, and furniture layout

  • Visualize planting zones or play areas

The catch is, online tools don’t account for site grading, structural stability, or drainage—things we solve for every day.

So go ahead, use online tools to get inspired. Then bring your ideas to us, so we can do the heavy lifting.

Real Layout, Real Results: What Planning Prevents

We’ve been called in to fix plenty of projects that skipped proper planning. Here’s what that often looks like:

  • Standing water on patios because the pitch was off by just 1 or 2 degrees

  • Uneven wear or sinking pavers from lack of sub-base compaction

  • Grills or furniture in an undesirable location because no one tracked sun exposure

  • Retaining walls buckle after winter due to improper drainage

In contrast, a professionally designed layout plan doesn’t just look better, but it performs better year after year. 

Backyard Layout Tips: Questions to Ask Now

  • What do you want to do outside? Cooking, reading, soaking up sun, hosting?

  • Where are your main traffic paths? Think driveway to backdoor, kitchen to grill, or garage to garden.

  • What’s your style? Clean and modern? Organic and natural? That informs layout geometry.

  • Do you want privacy? We can work in screens, berms, or tall plantings.

  • Will the space need lighting? Layout planning also includes electrical planning when needed.

Getting Started with Planning Your Backyard Layout

You wouldn’t build a house without a blueprint. The same goes for your outdoor space. A detailed layout plan is the foundation that makes sure everything looks incredible, works flawlessly, and holds up over time.

And at Decra-Scape, our layouts are created with your property, your vision, and your lifestyle in mind. Serving clients in Sterling Heights, West Bloomfield, Troy, Birmingham, and throughout Oakland, Macomb, and Wayne Counties.

Have more questions about backyard planning? We’d love to discuss the options with you

The Ultimate Guide to Hardscape Maintenance and Repairs

Your outdoor space is an investment, and like any investment, it requires care to maintain its beauty and functionality. From polymeric sand to sealants, regular upkeep will extend the life of your hardscape features, helping them look pristine for years to come. 

Whether you're maintaining your patio, walkways, or retaining walls, here’s everything you need to know about keeping your outdoor living space in top condition:

Polymeric Sand: A Must for Paver Joints

Polymeric sand is a mixture of fine sand and polymeric additives that is used to fill in the joints between pavers, tiles, and other pavement materials. When water comes into contact with the polymeric sand, it activates the bonding agent that binds materials together, resulting in a flexible, concrete-like material to fill in between the joints.

The most common polymeric sand colors include tan and grey, offering a natural look that complements various paver styles. This type of sand provides several benefits, including durability and resistance to weeds, insects, and rain. 

Compared to regular sand, polymeric sand is more effective at deterring weed growth and insect penetration while also being more resistant to erosion caused by rain.

How to Clean & Sand

Brick paver sanding should be refreshed approximately every 3 – 5 years, depending on the area's conditions. Whether you have a traditional patio or a curved paver walkway, proper maintenance will help prevent shifting and ensure long-term durability. 

In shaded, frequently damp locations, moss growth is more likely. The entire process takes about two days to complete, with cleaning on the first day and sanding on the second.

Day 1: Cleaning

  • A pressure washer is used to remove all existing joint sand and debris.

  • The area must dry completely before sanding can begin.

  • Drying time depends on:

    • The base material used for the original paver installation

    • Weather conditions

    • The location of the pavers

    • The pitch (slope) of the pavers

Day 2: Sanding

  • New polymeric sand is poured and spread into the joints.

  • The sand is compacted using a plate compactor.

  • Excess sand is carefully removed.

  • The surface is lightly watered to activate the bonding agent.

  • All foam from the activation process must be removed to prevent hazing (a two-person task).

Important Notes:

  • Although polymeric sand is weed-resistant, it is not weed-proof. Weeds can form in between joints when seeds are blown from above into unkept paver joints.

  • If the sand is installed before the area is dry, there is a high likelihood the sand will leave hazing on the pavers.

  • Power washing and sanding can be done anytime temperatures are above 40 degrees.

Sealing: Protecting Your Pavers

Applying a sealant to brick pavers is an effective way to enhance their appearance while providing long-term protection. Sealants create a protective barrier that helps prevent damage from weather, stains, and organic growth like mold, mildew, weeds, and moss. 

Beyond protection, sealing also improves the overall look of pavers by enhancing their natural color and giving them a fresh, well-maintained finish.

Note: If you’re considering upgrading your driveway, check out these brick driveway ideas for inspiration on creating a timeless, durable entrance.

There are 2 main types of sealants: water-based and solvent-based. 

Water-based sealants are the most recommended option because they penetrate deeper into the surface and help harden the joint sand, which strengthens the overall paver structure. These sealants also tend to be easier to apply and reapply over time. 

Solvent-based sealants, on the other hand, offer greater durability and longevity, making them a preferred choice for high-traffic areas. However, they can be more difficult to reapply when the time comes for maintenance.

In terms of benefits, sealed pavers are easier to clean and maintain since the protective layer prevents dirt and grime from embedding into the surface. Stains from oil, food, and other spills are less likely to seep in, making cleanup much simpler. 

Additionally, sealing helps protect against the natural elements, reducing the wear and tear caused by rain, snow, and UV exposure.

How to Clean & Seal

When sealing your paver surface, polymeric sand application is not required beforehand. However, if polymeric sand is used, you must wait at least 30 days after installation before applying a sealant, to ensure proper curing. 

For newly installed patios, it is recommended to wait a full year before sealing, to prevent trapping efflorescence—a natural white residue that can appear on pavers.

Ideal Temperature & Weather Conditions

For the best results, sealing should be done under the following conditions:

  • Temperature: Between 50°F and 90°F

  • Humidity: Low humidity levels

  • Rain: No rain expected for at least 24 hours after application

Sealing Step-by-Step

  • Clean the Surface: Remove all dirt, dust, and debris to ensure a smooth application.

  • Check for Leveling: Ensure the surface is even and properly set before sealing.

  • Apply the Sealer: Use the appropriate tools to spread the sealant evenly across the surface.

  • Allow for Drying: In optimal conditions, the sealer should be allowed to dry approximately 24 hours before the surface is used.

In Michigan, sealing generally takes place between May and August, because of the overnight temperatures.

While sealing is essential for protecting paver surfaces, other hardscape elements, like retaining walls and steps, also require proper maintenance. Though they don’t need sealing, they still benefit from routine care to prevent structural issues.

Wall Maintenance

Unlike pavers, walls and steps do not require aggressive pressure washing, because they are constructed differently. These structures are typically bonded with adhesive glue or connected through pin systems, which can be compromised by high-pressure water. Excessive force can weaken the bonds, causing the materials to shift or separate over time.

Instead, walls and steps should be lightly power washed as part of routine paver maintenance. A gentle wash helps remove dirt, dust, and minor surface buildup without damaging the structural integrity of the wall. For areas with stubborn stains, a soft-bristle brush and mild detergent can be used to spot-clean.

Regular maintenance also includes checking for shifting or loose stones and ensuring proper drainage around the wall. Water buildup behind retaining walls can lead to long-term structural issues, so keeping weep holes or drainage channels clear is essential. 

Additionally, applying a sealant can help protect the surface from weathering, stains, and organic growth like moss or mildew.

How to Keep Pavers Looking Good Between Professional Maintenance

Shovel snow off in the winter: Any hard surface (pavers, concrete, asphalt) will have a longer life cycle when snow is removed.

Remove leaves in the fall: If leaves are not removed, they can cause temporary staining and help moss grow.

If water is puddling on the patio, call Decra-Scape: A minor repair can prevent standing water from making the problem worse.

Keep gutters in the area clean: Prevent water overflow onto the pavers or near your home’s foundation.

Do not use heavy chemical salts on pavers: Ask Decra-Scape about our approved salt list.

Do not power wash your patio: Power washing can result in the loss of polymeric sand. Instead, simply use a hose to rinse the surface.

Final Thoughts

Maintaining your outdoor living space doesn’t have to be overwhelming. By following a regular maintenance schedule, using high-quality materials like polymeric sand and sealants, and taking simple steps to keep your patio in great shape, you’ll enjoy a luxurious and long-lasting hardscape. 

Not sure which materials are best for your space? Explore different patio surface options to find the perfect fit for your outdoor area.

Have more questions about hardscape maintenance and repairs? We’d love to discuss the options with you. For more inspiration, check out our gallery of our work, read more on the blog, or catch up with us on Instagram

2024 Recap: Your Go-To Guide for Hardscaping and Outdoor Living

As the year wraps up, we’re reflecting on an incredible year of outdoor-living insights, ideas, and inspiration shared on our blog throughout 2024. 

From paver patterns to outdoor kitchens, here’s a curated look at our top posts, organized by topic. Our hope is that this will be a helpful resource for you to use as you make your outdoor spaces the best they can be.

Outdoor Kitchens and Grilling Spaces

Transform your backyard into an entertainer's paradise with these posts:

6 BBQ Storage Solutions for a Tidy and Organized Outdoor Grilling Space

7 Stylish and Durable Outdoor Bar Countertop Ideas

Create a Home Beyond the Walls: The Perfect Outdoor Kitchen

7 Simple Outdoor Kitchen Ideas for Ultimate Entertaining & Leisure

Quartzite Vs. Granite for Outdoor Kitchen Countertops

Pavers and Hardscaping

Make the most of your outdoor surfaces with our expert advice:

How Interlocking Pavers Protect Surfaces During Freeze-Thaw Cycles

Cobblestone vs. Pavers: Which is the Right Choice for Your Project?

Brick Patterns for Walkways: 11 Options to Elevate Your Outdoor Spaces

The Paver Palette: The Most Popular Brick Paver Colors

Best Paver Patterns for Curved Walkways

The Perfect Cobblestone Alternative

Fireplaces and Firewood

Cozy up outdoors with these fire-focused ideas:

Firewood Storage Tips for Outdoor Fireplaces

The Ultimate Guide to Outdoor Fireplaces

Drainage and Retaining Walls

Keep your hardscapes sturdy and your spaces dry:

Why PVC is the Right Choice for Drainage: A Professional’s Perspective

Guide to Segmental Retaining Walls

Outdoor Living Tips

Enhance every corner of your property with these tips:

Exploring Patio Surface Alternatives for Your Outdoor Space

Enhancing Your Outdoor Space with Roofed Shelters

7 Outdoor-Living Tips from Michigan Designers

Ideas to Transform Your Side Yard into a Patio, Retreat, or Play Space

Landscaping and Maintenance

Keep your outdoor spaces beautiful and functional for many years to come:

How to Clean a Stone Walkway: 9 Tips to Maintain Beauty and Durability

Freeze-Thaw Resilience: Choosing the Right Materials & Maintenance for Michigan Winters

How to Make a Sloped Backyard Usable

High-End Design Ideas

Create an elegant space with these premium tips:

Incorporating Water Features in Your Commerce Twp, MI Landscape Design

8 High-End Backyard Designs & Ideas

We hope you’ve enjoyed following our blog this year and found inspiration for your outdoor projects. Stay tuned for more in 2025, as we continue to bring you the best in hardscaping and outdoor living.

For more inspiration, check out our gallery of our work, read more on the Decra-Scape blog, or catch up with us on Instagram

Top 6 Tips to Prepare for Cold Temperatures Ahead

As the weather changes, many of our clients ask what they can do to prepare their yards for cooler temperatures. Great question!

Today, we’re sharing our top 6 recommendations for keeping your outdoor spaces beautiful through the colder months—and protecting them for lots of use next spring.

1. Clear Patio of Leaves

Falling leaves can be beautiful, but when they sit in piles on your patio, leaves can lead to staining. Sure, those leafy silhouettes look cool at first, but when rain washes over fallen foliage, the tannins in the leaves are released, leaving behind visible traces. These marks are particularly noticeable on lighter-colored surfaces, much like how strong black tea can stain porcelain cups or tooth enamel with its tannin content.

As part of your cool-weather preparation plan, regularly sweep leaves from patios, walkways, driveways, and other hard surfaces to prevent discoloration.

Learn more about maintaining a winter-proof driveway

2. Trim Plants

Trimming plants makes them stronger and encourages flowering, and it also plays a crucial role in protecting them from the harsh effects of colder temperatures. Cutting plants back in the fall can mean beautiful growth next spring!

Different plants have different recommendations for cold-weather pruning, so do your research or get in touch if you’d like to talk to a landscape specialist. Here are some thoughts to get you started:

Maple, Birch, and Walnut Trees: Prune in late winter to early spring, before new growth begins. This timing minimizes sap loss and reduces stress on the trees. 

Apple and Pear Trees: Late winter pruning helps establish a strong framework and promotes better fruit production.

Stone Fruits (e.g., Peach, Cherry): Prune in late winter to early spring. Focus on removing dead or damaged wood and thinning branches to allow light penetration. 

Hydrangeas: For smooth hydrangeas, cut all stems to the ground in late winter. For bigleaf or oakleaf hydrangeas, prune after flowering but before new buds set. 

Pine Trees: Prune in late winter to early spring, focusing on removing dead or damaged branches. 

3. Burlap Trees and Shrubs

Burlap cloth does a great job keeping moisture in while protecting your plants from harsh winds and frost. 

Arborvitae, boxwood, juniper, and other broadleaf evergreen shrubs can benefit from burlap covering during extreme cold.  

4. Clean and Test Drains and Gutters

Falling leaves can also land in gutters and drains, making it hard for water and snowmelt to properly drain off of your house and away from your patio and landscaping. 

Clearing the gutters and drains regularly will help prevent clogs and potential water damage in the months ahead.

5. Salt Smart

Many homeowners choose to use salt on hard outdoor surfaces to minimize ice and snow in walkways. However, some salts can be corrosive and damage the surface of your pavers in the long run. Here are some tips to avoid damage:

  • Less is more! When it comes to de-icing materials, use only as much as needed to do the job. This will maximize the benefits while minimizing damage to your concrete pavers and the surrounding environment.

  • Whenever possible, use rock salt (sodium chloride or NaCl) on concrete materials, as it is the least damaging. If you need a more effective de-icer, or one that acts more quickly, consider the judicial use of calcium chloride. 

  • Never use magnesium chloride or CMA, as both can chemically degrade all types of concrete.

  • Remember, de-icing chemicals should not be used in place of snow removal, but rather for melting ice formed by freezing precipitation or freezing snow melt.

  • Protect vegetation and metal from contact with de-icing chemicals.

  • Avoid the use of sand on permeable interlocking concrete pavers.

Learn more: Choosing the Right Materials & Maintenance for Michigan Winters

6. Protect the Kitchen

When temps drop, cover grills, outdoor kitchens, and countertops with weather-resistant materials to shield them from the elements, and winterize gas and water lines. Clean and store cushions indoors, or invest in weatherproof covers to protect them. 

For more great tips and inspiration, check out our gallery of our work, read more on the Decra-Scape blog, or catch up with us on Instagram

6 BBQ Storage Solutions for an Organized Outdoor Grilling Space

Whether you’re a weekend warrior or a grilling enthusiast, you know your quest for the perfect meal starts long before the food hits the grates. Keeping your tools, accessories, and supplies in order helps cut down on frustration and minimize prep headaches, so you can give your BBQ experience your full love and attention. 

Plus, caring for your outdoor-cooking area will help your equipment last for years to come!

Although most true Michigan BBQ enthusiasts keep the fires burning no matter the weather, the colder months tend to see slower action around the outdoor kitchen. So this is a great season to invest some time in organization. 

Here are 6 ideas and options to get you moving toward better organization in your outdoor grilling space:

1. Outdoor Storage Cabinets

Outdoor storage cabinets are a must-have for serious grillers. Made from weatherproof materials like resin or stainless steel, these cabinets are built to withstand the elements. 

They provide the perfect place to store BBQ utensils, grill covers, small tools, and even larger items like propane tanks. The key advantage of outdoor cabinets is their durability, allowing them to resist rust, fading, and warping over time. 

With multiple compartments, these cabinets ensure everything is within arm’s reach when you fire up the grill.

Read More >> Create a Home Beyond the Walls: The Perfect Outdoor Kitchen

2. BBQ Grill Covers

One of the simplest ways to protect your BBQ investment is with a high-quality grill cover. A weather-resistant cover shields your grill from rain, snow, sun, and debris, ensuring it remains in top condition between uses. 

For maximum protection, opt for a custom-fit cover that wraps snugly around your grill, preventing moisture from getting in and minimizing wear. 

3. Rolling BBQ Carts

If you’re working with limited space or need some extra mobility, rolling BBQ carts are an excellent option. These carts often feature built-in storage compartments for grilling tools, condiments, and charcoal, making them highly convenient for moving around your patio or deck. Some even come with side shelves that offer extra prep space. 

With wheels for easy transportation, rolling carts are ideal for small spaces or outdoor gatherings, allowing you to store all your essentials in one place without sacrificing portability.

4. Under-Grill Drawers or Shelves

Many grills come with built-in storage solutions in the form of under-grill drawers or shelves, offering a handy place to stash utensils, grilling accessories, or even your cleaning brush. If your grill doesn’t come with storage, don’t worry—adding custom shelving or drawers is a simple upgrade that can greatly improve your setup. 

5. Storage Bins for Charcoal and Wood Chips

Airtight storage bins are essential for keeping your charcoal, wood chips, or pellets dry and ready for use. Moisture is the enemy of grilling fuels, so using plastic or metal bins with locking lids ensures that everything stays in good condition, regardless of the weather. 

6. Grill Tool Hooks and Racks

One of the easiest ways to keep your BBQ tools organized and accessible is by installing hooks or a magnetic tool rack near your grill. This allows you to hang tongs, spatulas, brushes, and other utensils so that they’re always within reach. Tool hooks and racks can be mounted directly on your grill or on a nearby wall.

For more design ideas, check out our Outdoor Kitchen design page.

It’s Time to Improve Your Grill Game!

Have more questions about outdoor grills, storage, and outdoor kitchens? We’d love to discuss the options with you

For more inspiration, check out our gallery of our work, read more on the blog, or catch up with us on Instagram

How Interlocking Pavers Protect Surfaces During Freeze-Thaw Cycles

How Interlocking Pavers Protect Surfaces During Freeze-Thaw Cycles

As temperatures lower during late fall and early winter, they may dip below freezing only to rise again. This freeze/thaw cycle can continue for months and impact the integrity and appearance of your paved surfaces in Sterling Heights, MI. Interlocking pavers are relied upon as one of the best options in areas subjected to these freeze/thaw cycles. Read on to discover a few reasons why.

Why PVC is the Right Choice for Drainage: A Professional’s Perspective

When it comes to drainage solutions, it's easy to get lost in the vast amount of information and opinions available online. Recently, one of our clients was unsure whether the PVC pipe we use is better than corrugated pipe—a question sparked by a YouTube video that suggested corrugated pipe might be the better option. 

Let us take a moment to explain why PVC is in fact the superior choice for most drainage applications, especially when compared to corrugated pipe.

1. Durability and Longevity

Simply put, PVC, or polyvinyl chloride, is renowned for its durability. It’s a rigid material that can withstand significant pressure and environmental factors without compromising its structural integrity. 

Over time, corrugated pipes, typically made from polyethylene, are prone to crushing or deforming, especially when buried deep under. But PVC pipes can withstand the pressure and last longer. As you probably know, a crushed pipe can cause blockages or reduce water flow, leading to potential flooding or damage to your property. 

With PVC, homeowners can alleviate much worry about a pipe collapsing under pressure—whether from soil or water volume.

2. Smooth Interior for Efficient Flow

A critical aspect of any drainage system is the ability to move water efficiently. PVC pipes have a smooth interior surface, which reduces friction and allows water to flow quickly and smoothly. This minimizes the risk of blockages, particularly in areas where debris may enter the drainage system. 

On the other hand, most corrugated pipes have ridges inside, which can trap debris, dirt, and sediment over time, increasing the likelihood of clogs and backups. A smooth option is preferable. 

3. Ease of Maintenance

Stemming from the above, PVC requires less maintenance compared to corrugated pipe. Again, because PVC is smooth inside, it is less likely to accumulate dirt and debris that can lead to blockages. 

And, if there is ever a need for maintenance or cleaning, PVC's straight, rigid sections make it much easier to access and clean than corrugated pipe (which tends to bend and warp, making maintenance more difficult and costly).

4. Root Intrusion Resistance

A common issue with drainage pipes is root intrusion. Over time, tree roots can find their way into pipes in search of water, causing significant blockages or even breaking the pipe. 

Corrugated pipes, which often have small gaps at the joints that roots can exploit, usually fare worse against Mother Nature than PVC pipes, with their seamless joints and sturdy construction. 

5. Installation Flexibility

While corrugated pipe is flexible and easier to bend around obstacles, this flexibility comes with downsides—namely, a lack of structural integrity in certain situations. 

So while PVC may be more rigid, it can be cut and put into place precisely, ensuring a long-lasting, tailored solution for any drainage project. 

Plus, PVC’s rigidity ensures that once it’s installed, it maintains its shape and flow capacity for years to come.

Final Thoughts: Trust Proven Solutions

Corrugated pipes may seem like an attractive option due to their lower upfront cost, but you should also consider the long-term expenses. 

PVC, while initially more expensive, is likely to save you money in the long run. Its durability, low maintenance needs, and resistance to common drainage issues make it a better investment. 

If you’re still unsure or need more personalized advice for your project, we’d love to discuss the options with you

For more inspiration, check out our gallery of our work, read more on the Decra-Scape blog, or catch up with us on Instagram

7 Stylish and Durable Outdoor Bar Countertop Ideas—Materials & More

Creating an outdoor bar is a great way to elevate your backyard entertaining space, providing a designated area to mix drinks, serve appetizers, or simply enjoy a relaxing afternoon with family and friends. 

On the way to getting it built, though, one of the key decisions you'll face is choosing the right countertop material. While your ultimate decision is your personal choice, you’ll definitely want something that not only looks great but can also withstand the outdoor elements. 

Here are a few ideas and options to consider, with details on each: 

1. Granite Countertops: Timeless, Weather-Resistant 

Granite is one of the most popular choices for outdoor countertops, thanks to its durability. This means granite is not only highly resistant to heat, but also scratches and stains, which makes it ideal for outdoor use. It can withstand changing weather conditions, from hot summers to cold winters, without showing signs of wear.

Granite also comes in a wide variety of colors and patterns, ranging from subtle neutrals to bold veining. And the natural stone can complement virtually any outdoor design style, whether you're going for a rustic, modern, or traditional look. 

In addition, granite is easy to clean, making maintenance a breeze. 

Just remember to seal it periodically to protect it from moisture and prevent stains.

2. Concrete Countertops: Industrial Elegance, Customizable

For those looking for a more modern or industrial aesthetic, concrete countertops are an excellent option. Because concrete can be molded into virtually any shape, size, or thickness, you have the ability to customize it to fit your outdoor bar design. You can also add color pigments or even embed objects like stones, glass, or tiles to give your countertop a unique look. 

Of course, concrete is known for its strength and durability, but it does require regular sealing to protect it from stains and water damage. With the right sealant, it becomes resistant to moisture, UV rays, and outdoor conditions. 

Another great feature of concrete is that it can be finished in different textures—from smooth and polished to rough and rustic—giving you further design versatility.

3. Tile Countertops: Vibrant and Easy to Clean

While tile countertops aren’t as versatile as granite or concrete, they can add a bit of extra color and personality to your outdoor bar. Tiles come in a wide array of styles, colors, and patterns, allowing you to create a lively and eye-catching design. Whether you prefer Mediterranean-inspired mosaic tiles or sleek, modern subway tiles, there's an option for every aesthetic.

But in an outdoor environment, tile can be tricky, so keep some key factors in mind:

Tile can bring ease of maintenance, but this reputation is limited to non-porous varieties, which resist stains and are easy to wipe clean. Be sure to select a non-porous option for outdoor living.

Grout lines between tiles can be prone to staining, so it’s important to seal them to prevent discoloration. 

Tile countertops can also get hot in direct sunlight, so consider placement if your outdoor bar will be in a sunny spot.

4. Wood Countertops: Natural Warmth with a Rustic Feel

Let’s not forget the ultimate outdoor material, wood. Warm and inviting, woods like teak, ipe, or cedar are popular choices for outdoor use, providing an organic look and rustic charm.

To maintain the beauty of wood countertops, you'll need to apply a weather-resistant sealant to protect the surface from water and UV damage. Regular maintenance is essential to prevent the wood from cracking or fading over time. 

However, if you're willing to invest the time in upkeep, wood can provide a timeless, natural look that ages beautifully.

5. Stainless Steel Countertops: Sleek and Functional

Sleek and modern. That’s stainless steel in a nutshell. Plus, it’s resistant to both heat and moisture, which means your entertaining space can show as a professional, high-end outdoor bar while remaining tough and durable. 

Also, let’s not forget that stainless steel is easy to clean and highly resistant to bacteria, making it a hygienic option for food prep and drink mixing.

The downside? Stainless steel can show fingerprints and smudges easily, so you'll need to clean it regularly to keep it looking pristine. 

All said, while stainless steel may not offer the same range of color and texture options as other materials, its polished, reflective surface can offer sophistication beyond what other materials can.

6. Quartz Countertops: Low-Maintenance Luxury

Sure, quartz is a popular indoor countertop material, but it can also be used outdoors with the right type. That is, certain quartz products are UV-stable, meaning they won't fade or discolor under direct sunlight. Quartz is also non-porous, making it resistant to stains, mold, and bacteria—perfect for an outdoor environment where spills and dirt are common.

Another major advantage of quartz is how easy it is to maintain. Unlike other stone, quartz doesn’t need to be sealed, making it a low-maintenance option for busy homeowners. 

The only downside here is choosing the wrong quartz. Again, since not all quartz is suitable for outdoor use, it's essential to choose a brand or product designed specifically for outdoor applications.

Read more about quartz vs. granite for outdoor kitchen countertops

7. Recycled Glass Countertops: Eco-Friendly and Eye-Catching

Last, if you would rather go eco-friendly and unique, consider recycled glass for your outdoor bar countertops. Made by combining crushed glass with a binder, the pieces in recycled glass countertops can vary in size and color, resulting in a surface that sparkles in the sunlight—and giving you the option to create a truly custom look. 

Recycled glass countertops are resistant to heat, scratches, and stains, making them a durable option for outdoor use. They also have a smooth, glossy surface that’s easy to clean. Plus, by choosing a recycled material, you're making an environmentally friendly choice for your outdoor bar.

Getting Started with Outdoor Bar Countertops

When choosing an outdoor bar countertop, it’s essential to consider both aesthetics and durability. Whether you prefer the natural beauty of granite and wood, the sleekness of stainless steel, or the eco-friendliness of recycled glass, there’s an option that will fit your style and stand the test of time. 

With the right countertop, your outdoor bar will become the perfect gathering spot for entertaining and relaxing. Have more questions about choosing the right material for your outdoor kitchen bar countertops? We’d love to discuss the options with you

For more inspiration, check out the Decra-Scape gallery of our work, read more on the blog, or catch up with us on Instagram

Firewood Storage Tips for Outdoor Fireplaces

When the first frosty mornings of fall have you dreaming of nights by the outdoor fireplace, you need to ensure access to a good supply of dry firewood. Especially in Michigan's climate, proper firewood storage is crucial, because wet, cold weather can quickly ruin your firewood if not stored correctly. 

How you store firewood will determine how easily you can start a fire in your outdoor fireplace, as well as how well that fire will burn and glow for a delightful ambiance (rather than an unpleasant, smoky mess).

First, Seasoning Firewood 

Before you even think about storing firewood, it's important to ensure that your wood is properly seasoned. Freshly cut wood, also known as "green" wood, contains a lot of moisture, which makes it difficult to burn efficiently. 

Seasoning involves allowing the wood to dry out for at least six months to a year before use. This process helps to reduce the moisture content, ensuring a better burn with less smoke and creosote buildup in your chimney.

You can purchase well-seasoned firewood from a quality supplier. Or, if you choose to season your own firewood, follow these steps:

  • Start by cutting the wood into manageable pieces, typically around 16 to 18 inches long (a size that will fit most fireplaces and wood stoves).

  • Split the logs into smaller pieces to increase the surface area exposed to air. This helps the wood dry out faster.

Stack the wood in a crisscross pattern or with gaps between the logs, and in a sunny spot with good airflow. Ideally, stack the wood on a raised platform or pallets to keep it off the ground and prevent moisture absorption from the soil.

  • Cover the top of the woodpile with a tarp or other waterproof material to protect it from rain and snow, but leave the sides exposed to allow moisture to escape.

All said, the wood should sit for at least six months to a year. Hardwoods like oak may take longer, while softer woods like pine can season more quickly.

You can tell if the wood is seasoned by checking for cracks in the ends of the logs, listening for a hollow sound when two pieces are knocked together, or using a moisture meter to measure the moisture content.

Long-Term Firewood Storage 

When storing wood for the long-term, a wood shed can be a great option. Ideally, the shed should be open on one side, again to allow for air circulation and help keep your wood dry and fungus-free. 

Also, it’s a good idea to continue keeping the firewood stacked and off the ground, which is made easier with pallets or a pair of two-by-fours. 

But keep your overall landscape design in mind. The location of the shed is important, depending on how frequently you use your outdoor fireplace and whether the shed itself is something you want to look at every day.

For example, if you use your outdoor fireplace often, you might want to position the shed close to the fire pit or fireplace for easy access to the wood. However, if the shed isn’t something you want in your direct line of sight, consider placing it behind a natural barrier, such as a row of shrubs, fence, or stone wall, to keep it out of view but also conveniently accessible.

Note: long-term storage also requires regular rotation of the wood to ensure that older, more seasoned wood is used first, and new wood is given time to dry.

Short-Term Firewood Storage 

Now, if you're storing firewood for short-term use, such as for the upcoming season, you don't necessarily need a dedicated shed. 

Instead, consider stacking the wood in a location that's easily accessible—perhaps on your patio, in openings built into your outdoor fireplace, in baskets around your fire pit, or on a covered porch. In all of these locations, it’s still important to keep the wood elevated and dry, similar to long-term storage. 

Short-term storage prioritizes convenience and aesthetics. It makes sense to keep your firewood close to your outdoor fireplace or firepit—or near your home, for indoor fires—to make grabbing a few logs quick and easy. 

While airflow is still important, short-term storage doesn't require the same level of ventilation, since the wood is intended for quick use.

The biggest difference here is the timeframe: while long-term storage is about preserving the wood for future seasons, short-term storage is about keeping it handy and ready to use within the next few weeks or months.

Firewood Use & Safety Tips 

No matter your timeframe when storing firewood, it's essential to consider safety. 

  • Keep your firewood pile at least 30 feet away from your home, to minimize the risk of fire hazards. 

  • Avoid storing wood near any potential ignition sources, like a grill or outdoor heater. 

  • Remember that storing firewood against the walls of your home or under a deck can lead to moisture buildup, which can cause mold growth and invite pests such as termites into your home.

If you don’t have a shed, a log rack placed at a safe distance away from the home can serve as long-term storage, since it keeps firewood off the ground and can be covered with a tarp. It’s a less attractive option than a wood shed, but easily portable if you want to change its location.

When it comes time to use your stored firewood, always use old firewood first. If you have wood left over from a previous season, move it to the front of your wood shed so that it’s easy to access. 

Also, remember not to spray firewood with insecticide, because you’d end up breathing the toxic fumes when you burn the wood.

By following these tips and choosing the right storage solutions, you can ensure a steady supply of dry, seasoned firewood, making your outdoor fireplace or firepit a warm and inviting gathering spot all season long.

Have more questions about storing your firewood and/or other home needs, including hardscaping and backyard renovations? We’d love to discuss the options with you

For more inspiration, check out our gallery of our work, read more on the blog, or catch up with us on Instagram